How to use WP Directory theme
WP Directory can be customized easily.
Here’s a step-by-step guide for configuring WP Directory.
Installing WP Directory theme
1. Download the wp-directory.zip file & unzip to themes folder located at
/wordpress/wp-content/themes
2. Go to WordPress Dashboard -> Appearance -> Themes
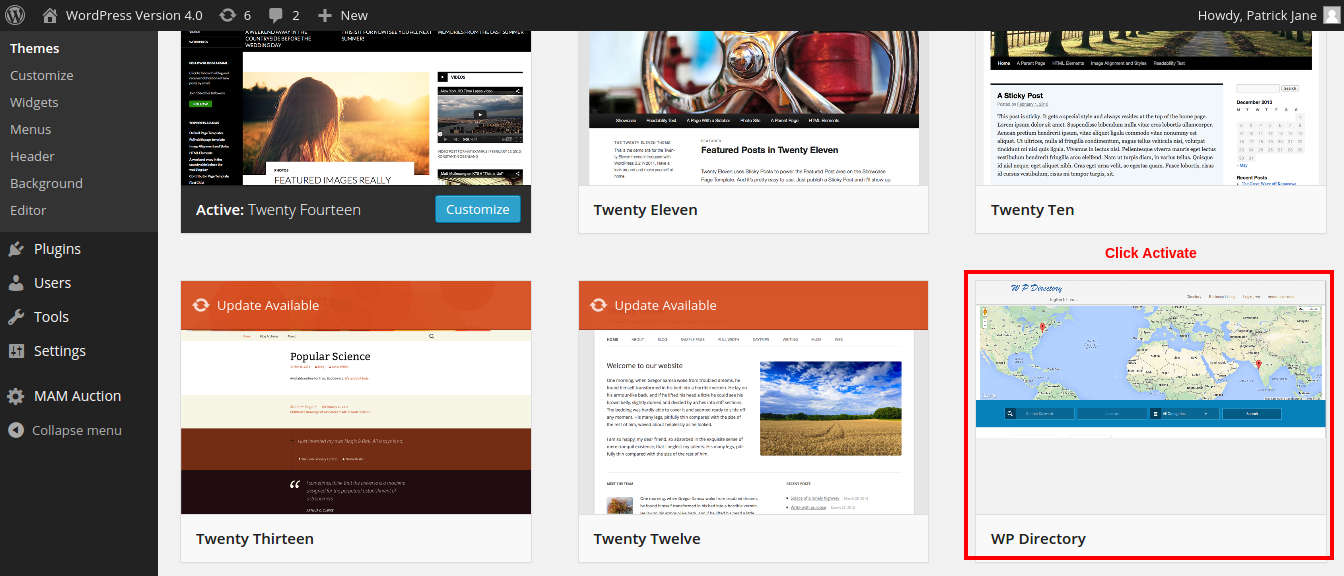
3. Activate WP Directory theme.
Customizing WP Directory
Go to WordPress Dashboard -> WP Directory -> Theme Options
Theme Options -> Header | Social Icons | Sidebars | Miscellaneous | Font Settings
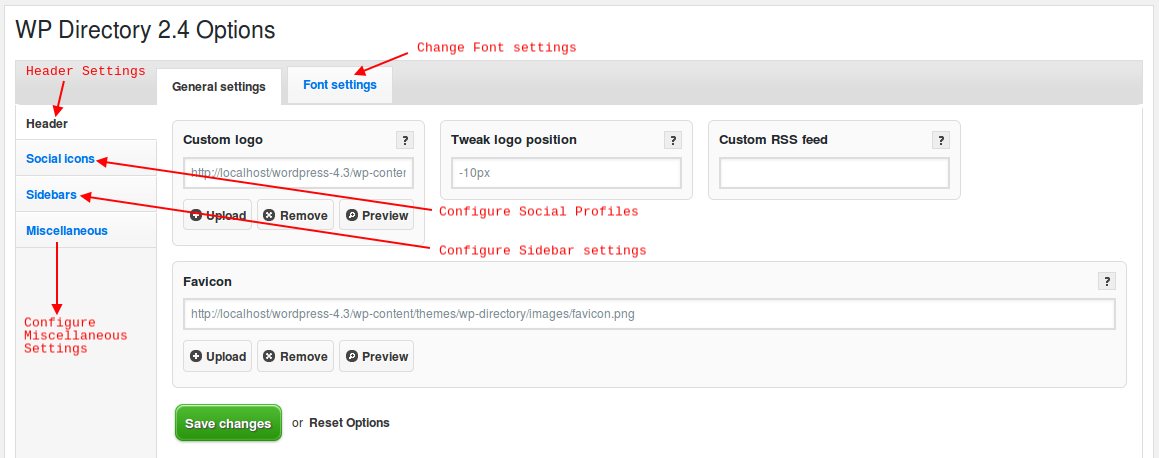
1. Header: Customize the header of your website.
You can add custom logos for your site, tweak the logo position, add a favicon & add a custom RSS feed.
2. Social Icons : Manage the social icons for your site.
Here you can add URLs to your social profile for Twitter, Facebook, Flickr, LinkedIn, Google+, YouTube, Pinterest & RSS.
3. Sidebars : Manage the sidebars of your site.
You can add custom sidebars & set the positions of the sidebars.
4. Miscellaneous : Manage the miscellaneous settings of your site.
You can modify the copyright text, affiliate ID, analytics tracking code, enable / disable other miscellaneous options.
5. Font Settings : Change the font settings of your site.
Click Save changes when done.
Managing WP Directory & Business Listings
Note : You need to add categories for business listings in order to add listings on your site.
1. Create Directory Listing Categories & Tags.
Go to WordPress Dashboard -> Directory Listing -> Listing Categories
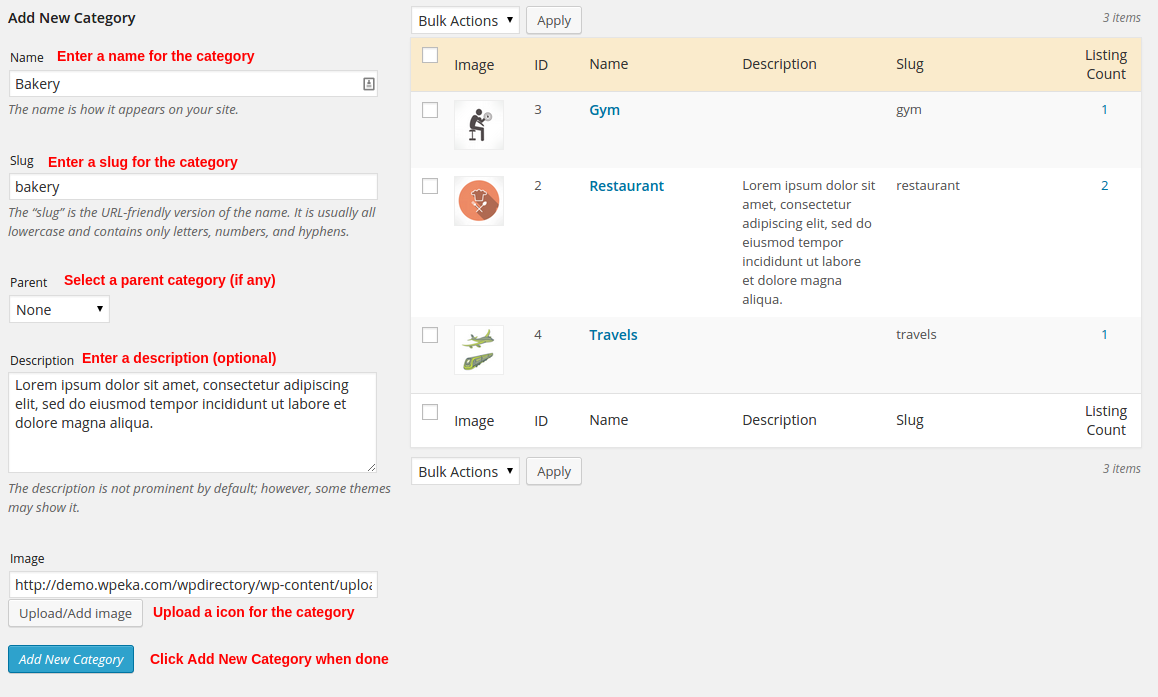
Enter category name, slug, specify parent category (if any), enter a description, upload an icon for the category & click Add New Category when done.
Similarly add directory listing tags by navigating to WordPress Dashboard -> Directory Listing -> Listing Tags
Note : If you are offering paid listings on your site, you need to enable payment options for the listings.
To enable payments go to WordPress Dashboard -> WP Directory -> Settings -> Payment tab

Check the Turn on payments checkbox to enable payments. Select a currency code & specify the currency symbol. Activate PayPal by checking the Activate PayPal checkbox. Specify your PayPal business email.
Note : You can charge different fees for different directory listing categories using the fee settings.
2. Specify a fee for directory categories (all categories or specific categories) which is applicable for the users’ listings on your website.
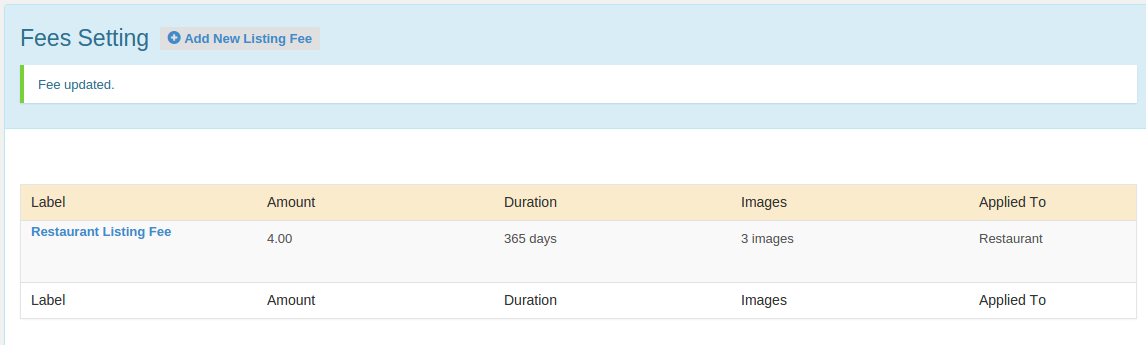
Go to WordPress Dashboard -> WP Directory -> Fees Setting & Click Add New Listing Fee.
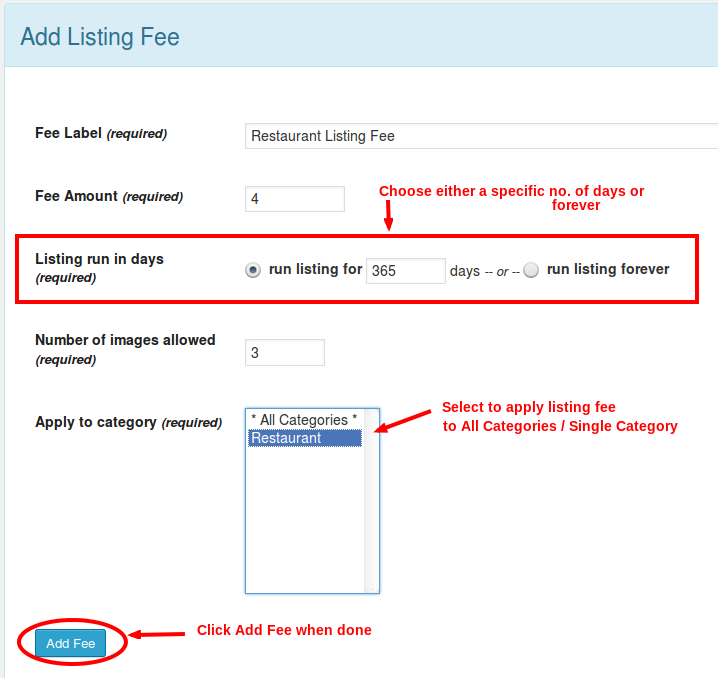
Enter the details & Click Add Fee when happy with the settings.
3. Add directory listing on your site.
Go to WordPress Dashboard -> Directory Listing -> Add New Listing.
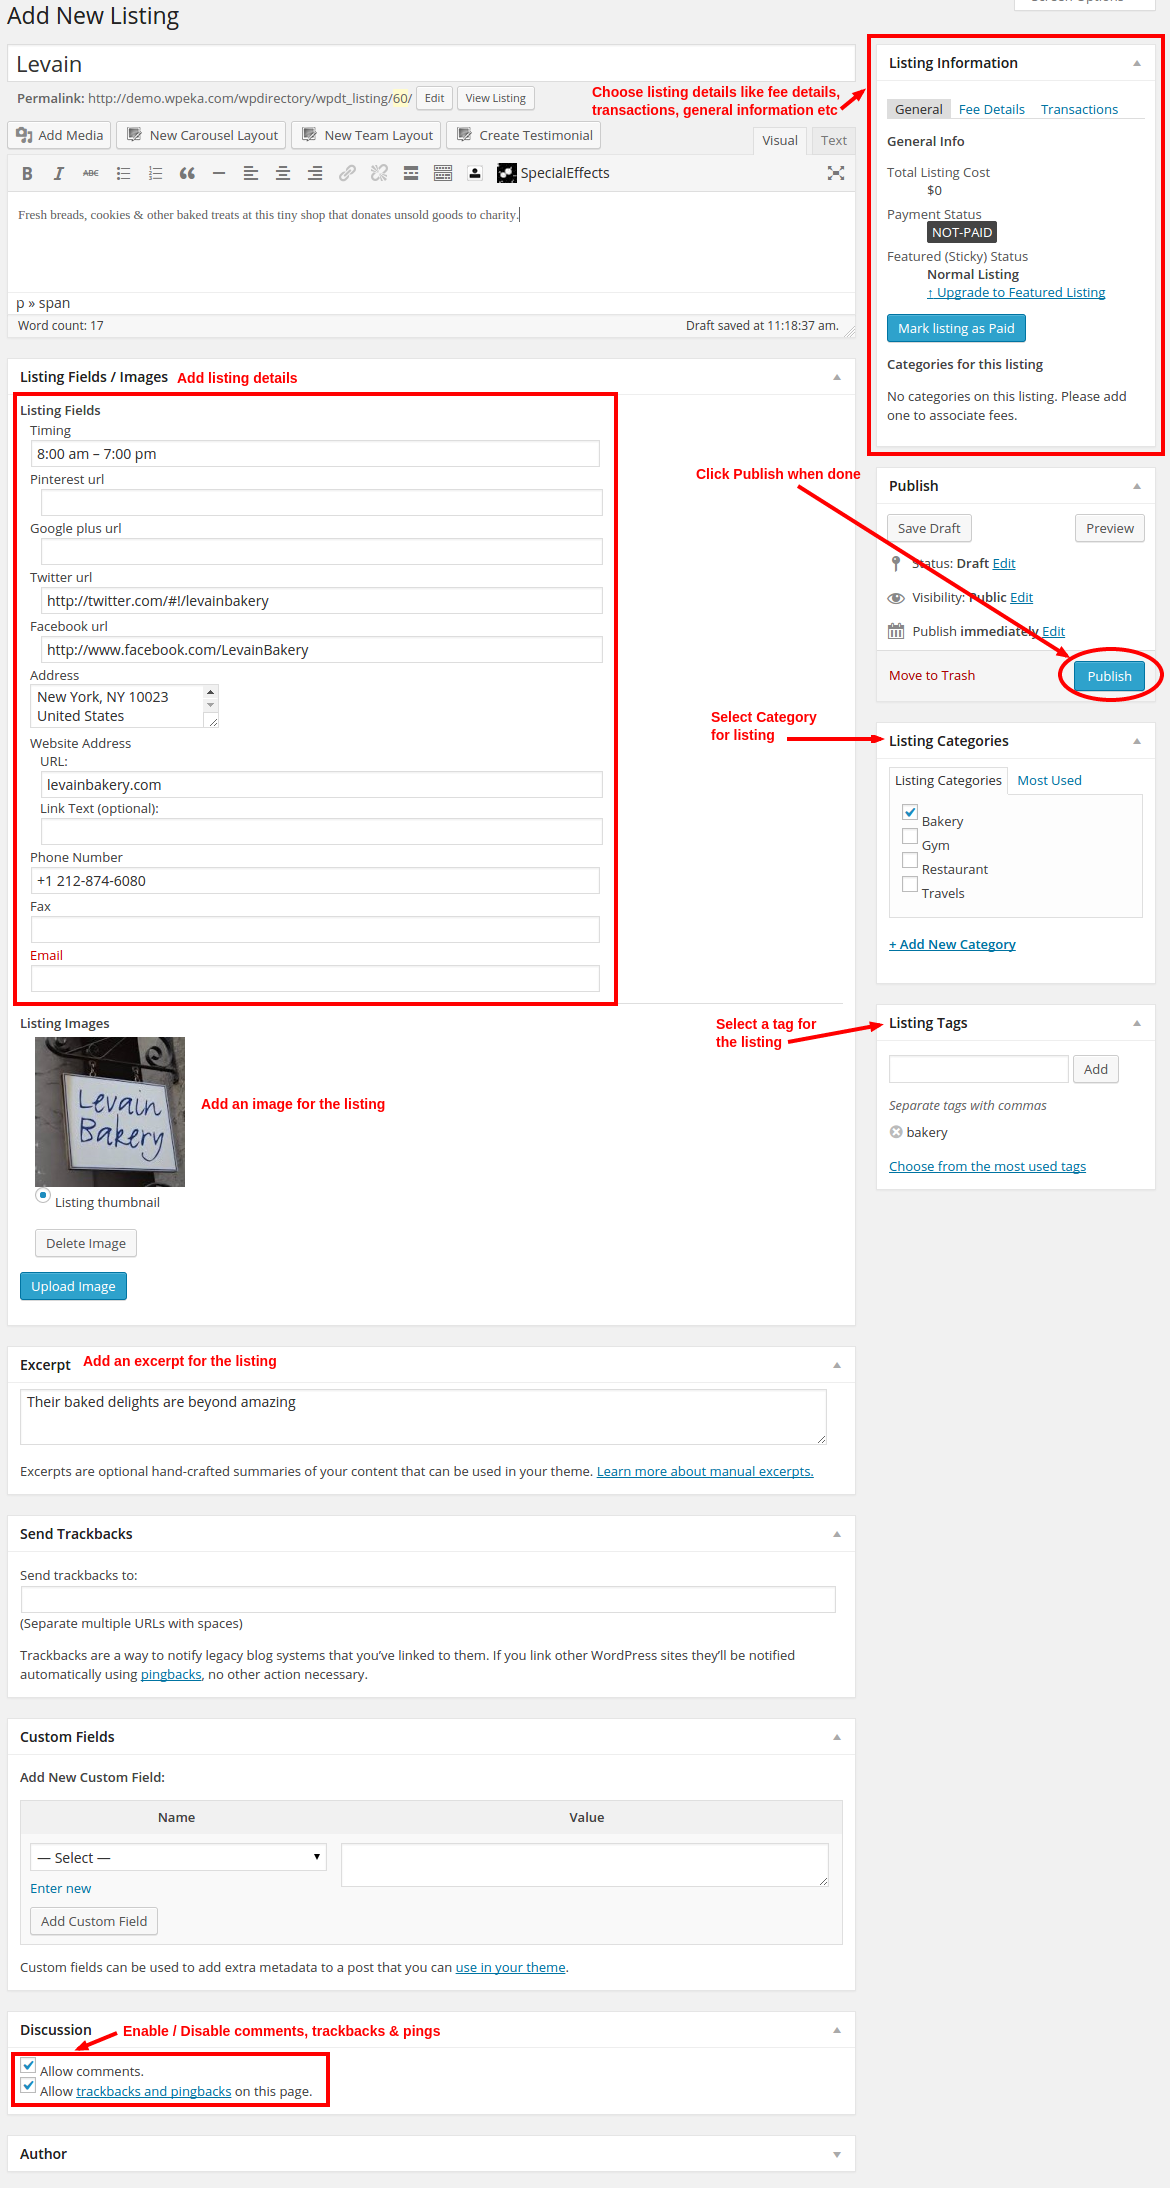
Specify the details & Click Publish when done.
So that’s pretty much what you need to know in order to get started with WP Directory theme. If you know of any other tips that I may have missed, do let me know by leaving a comment here.
For a live demo of the WP Directory WordPress Theme.
Use this amazing theme to power your directory website.
I am interested in the import/export facility and especially with your local directory would it not be great if you could import the businesses initially into the free advert category?
Yes Dave. It’s possible to do so. If you face any issues in doing it, please write to us at support[@]wpeka[.]com.
is it possible to add Video to a listing?
Hi Rod,
It is not possible right now. But thanks for a great idea! Let me see what can I do about it.