wShop WooCommerce WordPress theme – How to use it?

WShop- A beautiful WooCommerce WordPress theme. With wShop, you can showcase your products with great elegance.
Here’s a step-by-step guide for wShop.
Installing wShop – A WooCommerce WordPress Theme
1. Download the wshop.zip file & unzip to themes folder located at
/wordpress/wp-content/themes
2. Go to WordPress Dashboard -> Appearance -> Themes
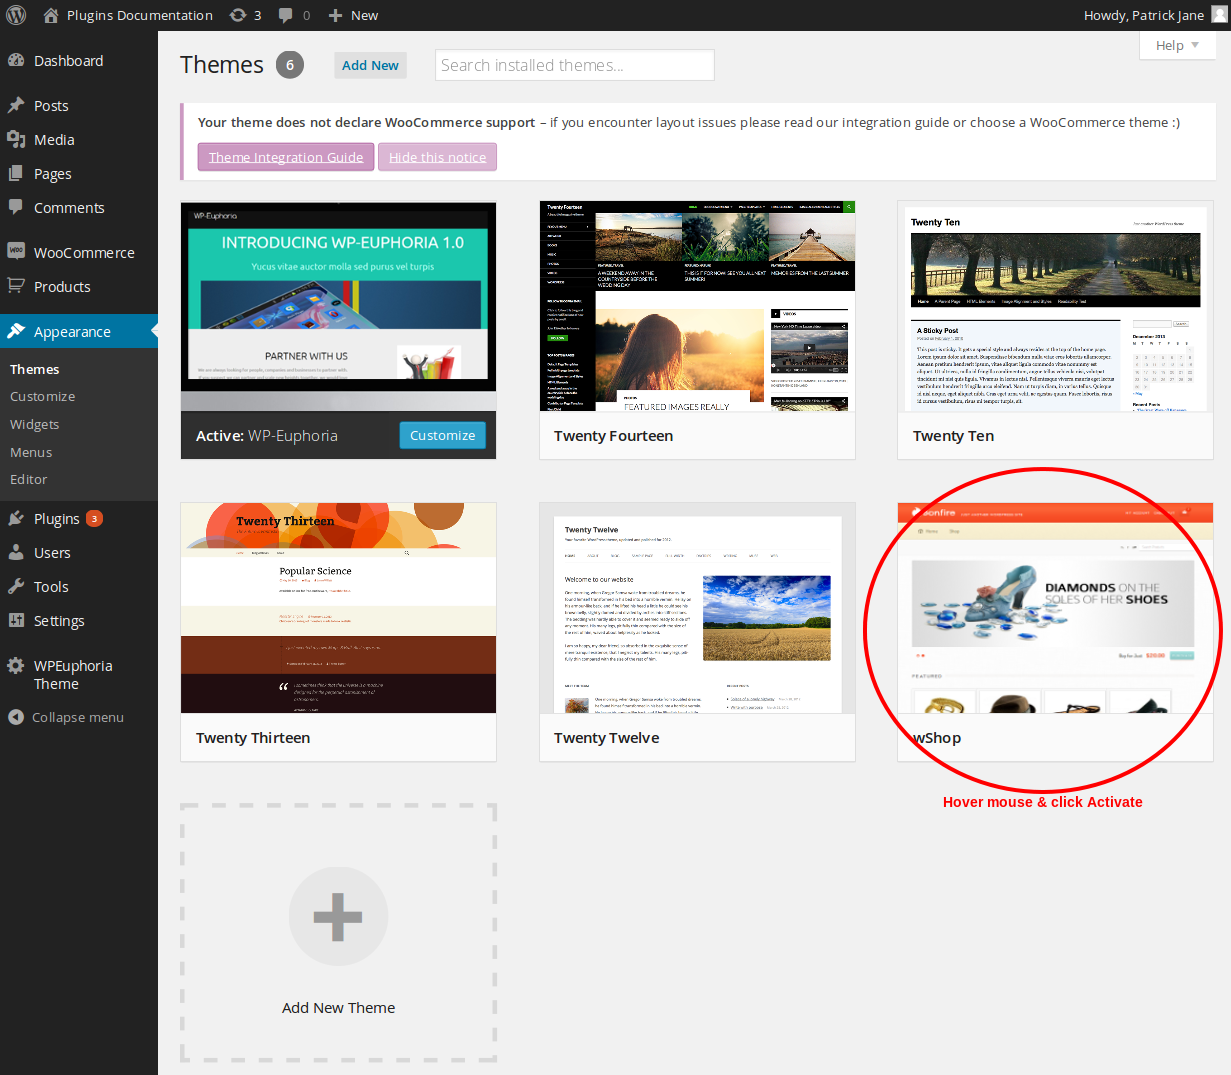
3. Activate wShop.
4. Go to WordPress Dashboard -> Chimera Themes

Customizing wShop
Remember : You need to have products on your website in order to use the various options in this WooCommerce WordPress theme. wShop uses WooCommerce for managing products. Please refer to WooCommerce documentation for how to add and manage products.
1. Header: Customize the header of your website.

General settings : Custom logo | Tweak logo position | Custom RSS feed
- Custom logo : Select a custom logo for your website.
- Tweak logo position : Change the logo position.
- Custom RSS feed : Add custom RSS feed URL.
Styling options : Custom CSS | Font options

- Custom CSS : Add custom CSS code for tweaking different theme areas.
- Font options : Use different fonts for your website.
Click Save changes when done.
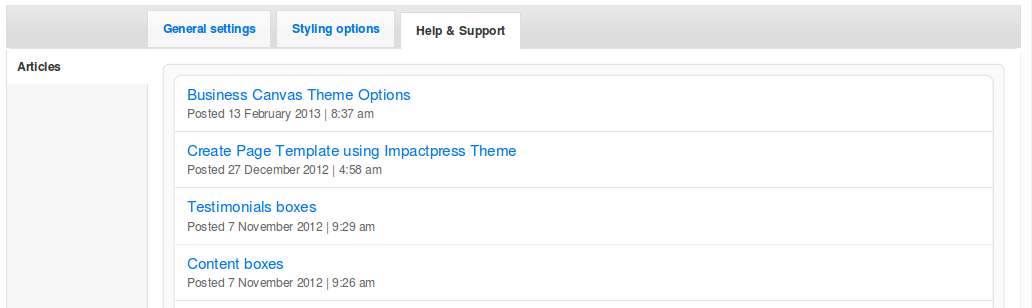
Help & Support : List of articles for help & support.
2. Homepage : Customize the homepage products section of your website.

General settings : Enable Featured Products | Enable Recent Products
- Enable Featured Products : Enable/Disable the homepage featured products section.
- Enable Recent Products : Enable/Disable the homepage recent products section.

Styling options : Custom CSS | Font options
- Custom CSS : Add custom CSS code for tweaking different theme areas.
- Font options : Use different fonts for your website.
Click Save changes when done.
Help & Support : List of articles for help & support.
3. Featured area : Customize the featured area on the homepage of your website. You can choose from either a dynamic product slider or a static featured area.

General settings : Dynamic product slider | Static featured area
3.1 Dynamic product slider : Manage the dynamic product slider on your website.
- Add new slide : Add new dynamic slider for products.
- Save options : Save the newly created slider.
- Add new item : Add new item to the dynamic slider for products.
- Save options : Save the newly created item.

Click Save changes when done.

3.2 Static featured area : Manage the static featured area content on your website.
- Content -> Title : Title of the content.
- Content -> Text : Text to display as in the content area.
- Screenshot title : Title for the screenshot.
- Enable screenshot link : Enable/disable the screenshot link.
- Screenshot Image : Screenshot image to be used.
- External Url : External URL for redirecting to another page using the screenshot image.

Click Save changes when done.

Styling options : Custom CSS | Font options
- Custom CSS : Add custom CSS code for tweaking different theme areas.
- Font options : Use different fonts for your website.
Click Save changes when done.
Help & Support : List of articles for help & support.
4. Titles : Customize the titles subheadings across your website.
General settings : Enable titles subheadings | Pages/Posts default title teaser | Categories default title teaser | Social icons
4.1 Enable titles subheadings : Enable/disable the title subheadings on your website.
4.2 Pages/Posts default title teaser : Disabled | Custom text
- Pages/Posts default title teaser -> Disabled : Disable the default title teaser for pages/posts.
- Pages/Posts default title teaser -> Custom text : Set a custom default title teaser for pages/posts.

4.3 Categories default title teaser : Disabled | Custom text
-
-
- Categories default title teaser -> Disabled : Disable the default title teaser for categories.
- Categories default title teaser -> Custom text : Set a custom default title teaser for categories
-

4.4 Social icons :
![]()
-
-
- RSS : Provide custom RSS feed URL.
- Twitter : Link to your Twitter profile page.
- Facebook : Link to your Facebook profile page.
- Flickr : Link to your Flickr profile page.
- Linkedin : Link to your Linkedin profile page.
- Google+ : Link to your Google+ profile page.
-
Note : Remember to copy the entire URL that displays your social media profile.
Click Save changes when done.
![]()
Styling options : Custom CSS | Font options
-
-
- Custom CSS : Add custom CSS code for tweaking different theme areas.
- Font options : Use different fonts for your website.
-
Click Save changes when done.
Help & Support : List of articles for help & support.
5. Sidebars : Manage the wShop sidebars to be displayed in the widgets area of your website.

General settings -> Sidebars : Create new sidebar | Custom sidebars | Sidebar default position
-
-
- Create new sidebar : Create a new wShop sidebar for your website.
- Custom sidebars : Manage the wShop sidebars on your website.
- Sidebar default position : Set default position of the sidebar (on left / on right).
-
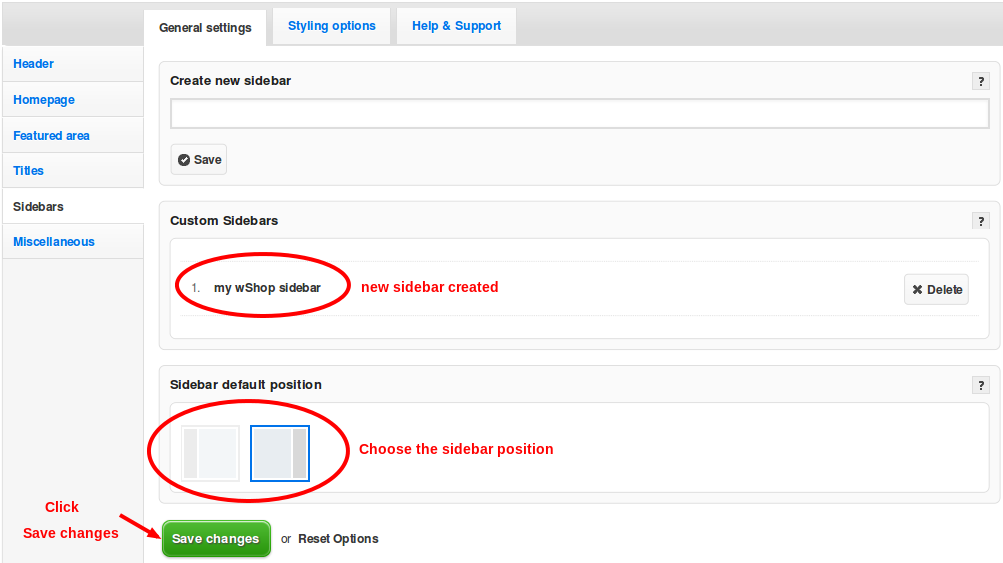
Click Save changes when done. Now the sidebar will be added to your widgets list. Modify it as you want & save the changes. Your wShop sidebar would look as follows.

Styling options : Custom CSS | Font options
-
-
- Custom CSS : Add custom CSS code for tweaking different theme areas.
- Font options : Use different fonts for your website.
-
Click Save changes when done.
Help & Support : List of articles for help & support.
6. Miscellaneous : Specify copyright content, affiliate ID & analytics tracking code by Google Analytics for improving page rank & other miscellaneous settings.
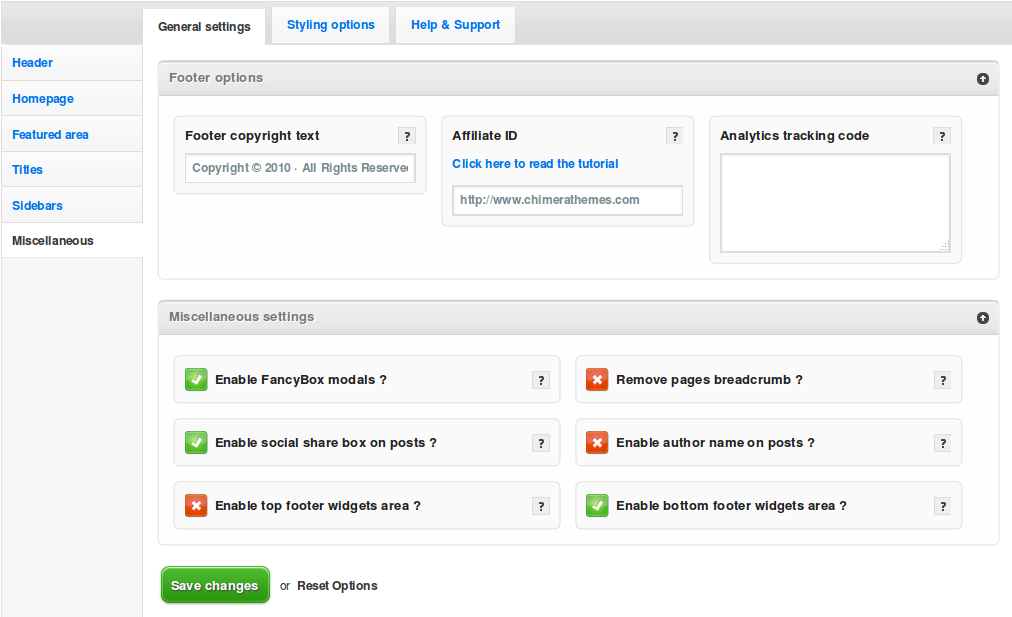
General settings -> Footer options : Footer copyright text | Affiliate ID | Analytics tracking code
-
-
- Footer copyright text : Add a copyright text to your website.
- Affiliate ID : Add your ChimeraThemes affiliate link.
- Analytics tracking code : Add your analytics code by Google for improving page rank.
-
Click Save changes when done.

General settings -> Miscellaneous settings : Enable FancyBox modals | Remove pages breadcrumb | Enable social share box on posts | Enable author name on posts | Enable top footer widgets area | Enable bottom footer widgets area
-
-
- Enable FancyBox modals : Thumbnails open modals with images or videos, rather than going to the post page.
- Remove pages breadcrumb : Remove the breadcrumb navigation from all pages.
- Enable social share box on posts : Enable social share box for all posts.
- Enable author name on posts : Enable author name for all posts.
- Enable top footer widgets area : Enable the top footer widgets area.
- Enable bottom footer widgets area : Enable the bottom footer widgets area.
-
Click Save changes when done.
Styling options : Custom CSS | Font options
-
-
- Custom CSS : Add custom CSS code for tweaking different theme areas.
- Font options : Use different fonts for your website.
-
Click Save changes when done.
Help & Support : List of articles for help & support.
7. Click Save changes when you are happy with your customizations.
8. Framework settings : Import/export theme settings & options.
Navigate to Chimera Themes -> Framework settings.
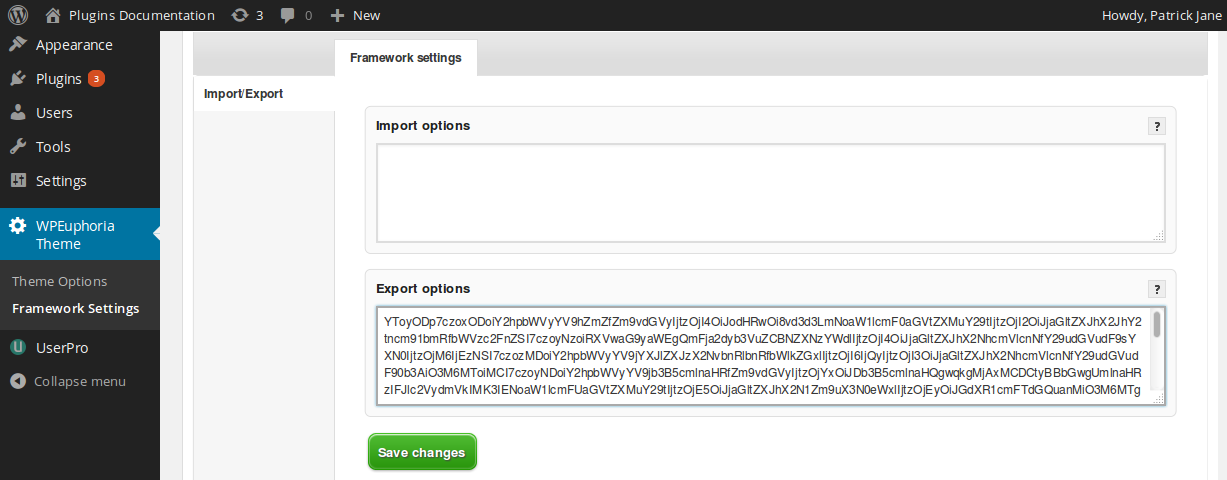
Click Save changes when done.
So that’s pretty much what you need to know in order to use wShop effectively. Check out the live demo of the wShop WordPress theme. If you know of any other tips that I may have missed, do let me know by leaving a comment here.
wShop is a great option for Online Store / eCommerce sites.
Leave a Reply