How to Resize, Crop and Optimize WordPress Images?

WordPress Image Optimization for Responsive Design

WordPress Image Optimization for Responsive design uses a combination of a fluid layout and media queries to define breakpoints at which a website’s layout or content changes to fit a particular screen size.
Most responsive websites target phones using media queries; some target tablets such as iPads as well.
Initially, making your images responsive meant using CSS to ensure they stayed nicely inside their containing element, with this code:
img {
max-width: 100%;
}
Images look tidy with this technique, but it shrinks the image to fit the layout. It does nothing to alter the actual size of the file, which could lead to huge image files sneaking onto your mobile design and seriously slowing down the website.
Displaying large images that have been shrunk with CSS is discouraged by the W3C, and it uses processing power and data, so it’s a particularly bad idea on mobile devices.
When we do responsive design now, we generally include some way of making the image’s actual size smaller, using one of a variety of established techniques.
Here is the code that displays the featured image for a given post:
<;?php the_post_thumbnail(); ?>;
The function has some parameters that we can use, the most relevant being image size. You can use any of the sizes defined by WordPress:
- Thumbnail: by default, a maximum of 150 × 150 pixels
- Medium resolution: by default a maximum of 300 × 300 pixels
- Large resolution: by default, a maximum of 640 × 640 pixels
- Full resolution: the original uploaded size
This is where our conditional function plays with the image’s size. Here is the full code we’ll need:
<?php
if (is_mobile()) {
the_post_thumbnail(‘medium’);
} else {
the_post_thumbnail(‘large’);
} ?>;
This code does the following:
- Checks whether the website is being viewed on a mobile device: if (is mobile());
- If so, outputs the medium resolution of the post’s thumbnail (or featured image): {the_post_thumbnail(‘medium’)};
- If not (i.e. else), outputs the large resolution:{the_post_thumbnail(large)}.
There are a few easy ways to make images responsive.
Before we go into these, I should mention that most of these solutions are addressing only the “height and width” aspects of using an image in a responsive theme.
There are also cases when you would want to use a more in-depth solution to address file sizes on mobile devices. But it is a whole ‘nother can of worms, and might lead to a bit more work than an average user would want to do. So for now, let’s just focus on Shrinking of those images!
Option 1 – Use a plugin.
There are multiple options available to choose from and each one is different than the other. Some use jQuery (a javascript framework) which will provide robust responsive image capabilities. The features offered will vary in each of the plugin, but none of them are deeply complex in case you understand the basic concept of having responsive images. For starters, I would definitely recommend Simple Responsive Images.
Other Plugins for Responsive Images are:
Option 2 – Manually remove the height and width from your image.
This option will be effective only if your responsive theme already has the styling in place to correctly size your content images. Thankfully, testing this is child’s play! All you need to do is take your editor into the text editing mode and remove the “height” and “width” from the image tag. Check it on your mobile device, too. In case all this proves to be correct, you’re all set!
Option 3 – Add your own styles to your theme.
Are you familiar with CSS? YES? Great!
You can add your own CSS to your theme to override the image height and width. You can either implement this on ALL images, or you can target a few images with certain class and make the necessary modifications.
Also read how to upload large images in WordPress, here : https://www.wpeka.com/how-to-upload-large-images-in-wordpress.html
Some Popular WordPress Image Optimization Plugins:
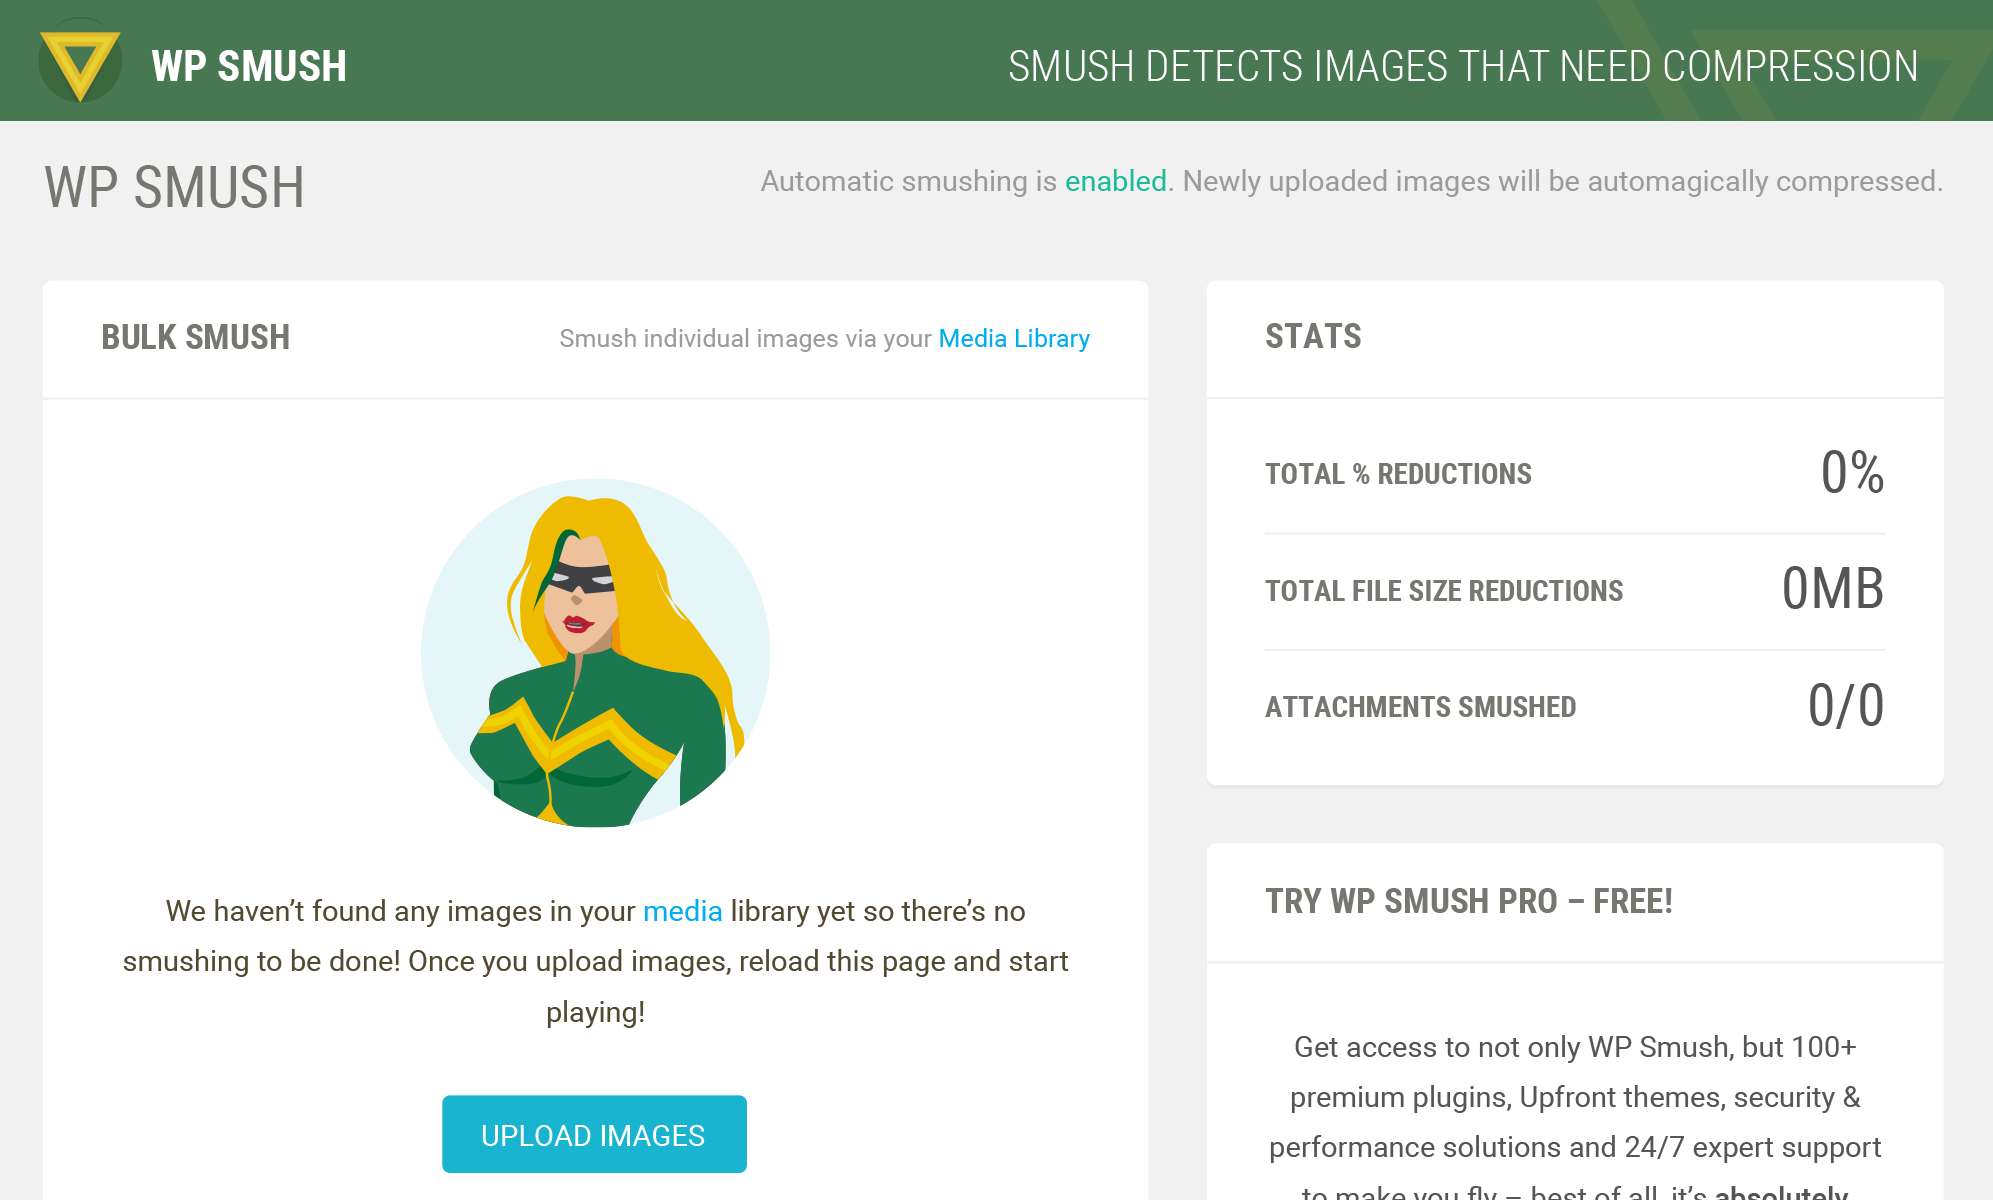
1. WP Smush :
You may not realize it that large sized images usually slow down your website. WP Smush uses super servers for promptly smushing each of your images and cuts down the unwanted data which prevents your website from being slowed down.
Features available for WordPress Image optimization include:
- Advanced Image Compression methods used to Optimize your images.
- Provision to Auto-smush your attachments on upload.
- Manual smushing by selecting each file in the media library,or 50 bulk attachments at a time.
- All standard web-sized images 1MB or smaller can be smushed.
- GIF, PNG and JPEG files can be processed.
- Monitor advanced compression statistics.
2. SEO Friendly Images:
SEO Friendly Images is a plugin which allows WordPress Image optimization in all the exsitent as well as upcoming images by automatically adding alt text and title text to them. This can lead to improving traffic from search engines. It lets you mend the following parameters:
- The images which don’t have alt and title text can be given both automatically.
- You can differentiate between the alternative and title text by using the combination of the 4 variables:
- %category – Post category can be replaced
- %tags – Post tags can be replaced
- %title – Post title can be replaced
- %name – Image file name can be replaced (without extension)
Plugin by Vladimir Prelovac
3. Watermark Reloaded:
This plugin allows adding watermark to your already uploaded images. You can also customize the watermark appearance from a user friendly settings page as per your WordPress Image optimization requirements.
- Watermarks with different colors and fonts can be created and these watermarks can be applied to different image sizes.
- Different positions for the watermark on an image can be decided from the Watermark Reloaded settings.
- These Watermarking settings are very easy to use and they provide you with an instant preview of how you watermark will look like on an uploaded image.

Image Courtesy: WordPress.org

WordPress Image optimization for your images before uploading using Media Manager
1. An Introduction to the Media Library
The WordPress Media Library stores every single media file, irrespective of whether or not it is ultimately published or not.
All types of images, videos, audios and even documents are a part of Media files.
These media files can be viewed, edited and managed from the library even if they are uploaded in some corner of your website.
It is also possible to integrate various plugins with your library to kick it up a notch. It’s portable, flexible and personalized. The advancements made in the recent versions of WordPress have made it one of the most sophisticated features in the world’s most user oriented Content Management System.

2. How to Change the Media Library Upload Limit
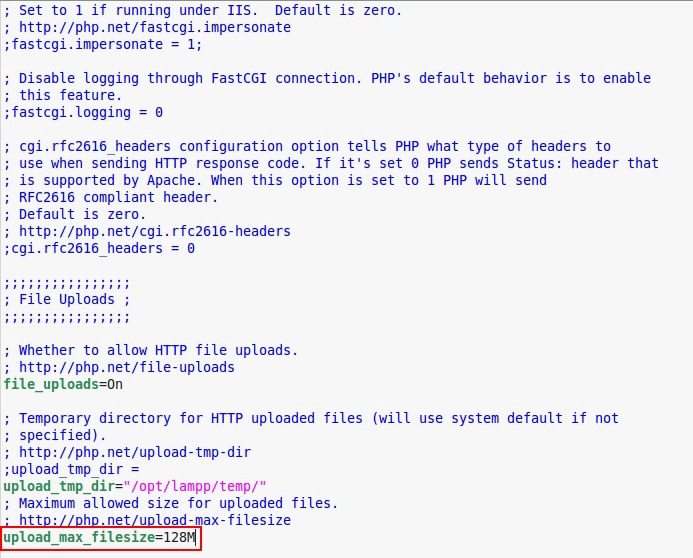
You may come across an error message along the following lines, if you have ever attempted to upload large media files:
The uploaded file exceeds the upload_max_filesize directive in php.ini
Fortunately, this problem is easily fixable.
But before we proceed, it’s sensible to note that we have upload limits are for a reason.
Exceeding the upload limit usually happens only when you’re uploading a video or audio file, which most people tend to host on specialized external services. It is obvious that the files that take a long time to upload will take a long time to download which can lead to user dissatisfaction along with a lot of noticeable strain on your server. It will need Image Optimization for which you can make the following changes:
In your php.ini file;
If upload_max_filesize=32M gives you an error, you can change it to:
upload_max_filesize=128M (just an example)
3. How to Prevent Duplicate Image Files
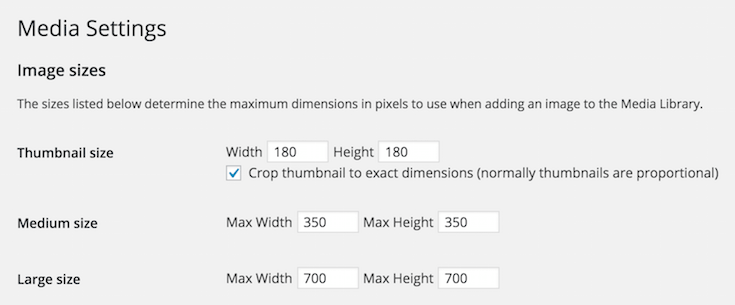
Duplication in multiple sizes is one of the most likely things to happen when you upload an image file to WordPress. The varied sizes from image thumbnails to larger versions of images can be useful to some users but for most people, it is a sheer waste of space!
And in case you’re anything like me (read: compulsive), all those unwanted files will irritate you to the core!!!
Let’s start by checking out the different image size that WordPress wants to create by navigating to Settings > Media:
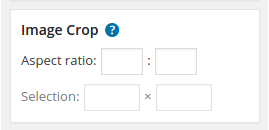
4. Crop an Image
By using WordPress you can crop images in multiple ways.
The most straightforward way is exactly how you do it on any other image editing tool: Drag the selection box to the desired image and crop.
To ensure you do not impact the aspect ratio, enter the values for your preferred aspect ratio, press the shift key and adjust the selection box.
The third and most tiring way to crop an image using WordPress’ inbuilt tool is by manually entering the dimensions (in Pixels) of the selection box. Use this last method only if your pixel estimation game is strong!
Confused on how to go about these multiple cropping methods? Don’t worry – WordPress can help you with that. Whenever you’re at a loss, just hit one of the blue question marks for more information:
5. Scaling an Image
Scaling images in WordPress is a easier than manually cropping and resizing them. Enter either a new width or height and click scale. That’s it! It’s that simple!
The only drawback of scaling is that you can only scale down because Scaling up will damage the pixel density. If you accidentally scale your image down to a nano scale size then you do not need to re-upload it, press the Undo Button and have a go at it again.
Summary:
Include images in your Blog post in a much smarter way by scaling, cropping and optimizing them as and when required. WordPress Image optimization is very essential so that your users don’t drift away from your extraordinarily written article. Images are the key to a better article! Use them!
[info]Note: This is the second part of the 3 Part Ultimate Guide About Images in WordPress series.
To read the 1st and 3rd parts, refer Ultimate Guide About Images in WordPress-I and Ultimate Guide About Images in WordPress-III[/info]
Leave a Reply