How to Fix the 403 Forbidden Error in WordPress
403 Forbidden is an annoying error. This error is mostly encountered by users who are new to WordPress. In this article, you’ll learn how to fix the 403 Forbidden error in WordPress.
Before we get into the fix of this error, let us first know what this error is and why does it occur.
What exactly is a 403 Forbidden – Access Denied Error in WordPress?
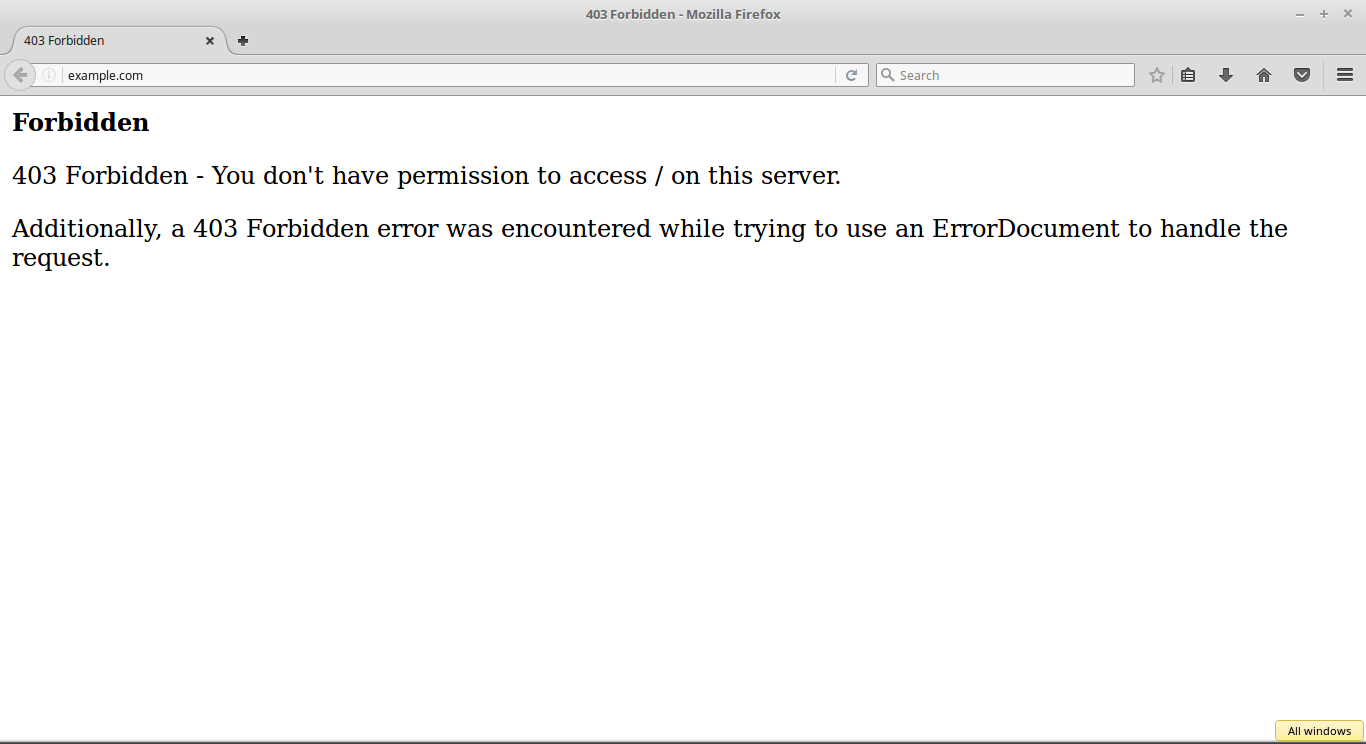
403 Forbidden error in WordPress is shown when your permissions don’t allow access to a specific page. The error is usually accompanied by text as you can see in the above image.
There are different instances when you can see this error.
- 403 Forbidden – Access denied on wp-admin or WordPress login page.
- You may also see ‘Access to yourdomain.com was denied. You don’t have the authorization to view this page.’
- 403 Forbidden – during WordPress install.
- It is also possible that you only get to see ‘Access Denied’ instead of full 403 Forbidden status.
- 403 Forbidden error when visiting any page on your WordPress site.
Let’s talk about the cause of this error.
Causes of 403 Forbidden error in WordPress
Poorly configured security plugin is one of the most common causes of 403 Forbidden error in WordPress.
The reason behind this is, these WordPress security plugins can block IP addresses if they believe them to be malicious.
Amongst the other causes for this error are, incorrect file permissions, corrupt .htaccess file.
It is also possible that sometimes your WordPress hosting company make some accidental changes.
Now that we know the common causes of this error let’s take a look at how to fix 403 Forbidden error in WordPress.
How to Fix the 403 Forbidden Error in WordPress
Before you get started with fixing this error, don’t forget to backup your WordPress website to avoid loss of data. Make sure to have the latest backup before moving forward.
How to fix 403 Forbidden Error Caused by a WordPress Plugin
If a plugin is causing this error, it is important to find the culprit plugin. To do so, you’ll have to temporarily deactivate all WordPress plugins, including the security plugin.
If the error goes away, then it means that one of the plugins was causing an error. To find the culprit plugin, activate one plugin at a time until you find it.
How to fix 403 Forbidden Error Caused by Corrupt .htaccess File
A corrupt .htaccess file is another common cause of 403 Forbidden error in WordPress. Fixing it is quite easy.
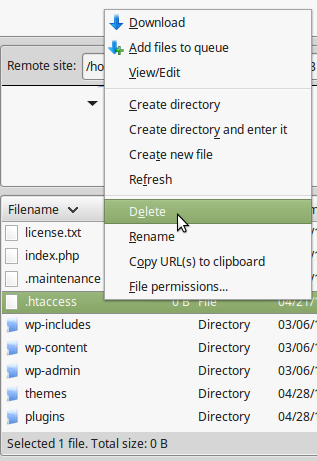
First, you’ll have to connect to your website using an FTP client such as Filezilla or file manager in cPanel.
After that, locate the .htaccess file in the root folder of your WordPress site. Download the .htaccess file to your computer. Then, delete the file from your server.
After the above steps are done, try accessing your website. The 403 forbidden error should’ve been resolved.
How to fix 403 Forbidden Error Caused by File Permissions in WordPress
All the files stored on your website have file permissions. These file permissions are responsible for controlling who can access files and folders on your website. If there is an incorrect permission, then 403 forbidden error occurs.
If the error is not solved by above two methods, then incorrect file permissions might be the cause.
You’ll have to contact your WordPress hosting provider to check your website for correct file permissions.
Changing file permissions can be risky, it can have serious consequences. You’ll have to do it carefully.
Connect to your WordPress site using an FTP client such a Filezilla. Navigate to the root folder of your WordPress website.
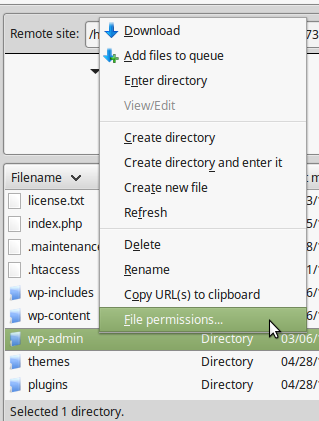
After selecting File permissions, your FTP client will show you a file permissions dialogue box like this:
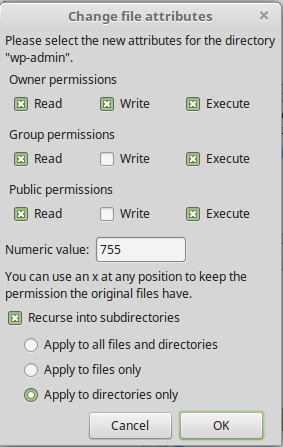
File Permissions of 744 or 755 are assigned to all the folders of your WordPress site. All files should have 644 or 640.
You can set the file permission to the root folder to 744 or 755 by checking the box next to ‘Recurse into subdirectories’ and then check the option that says ‘apply to directories only’.
Click OK button and your FTP client will now start setting permissions to all subdirectories in that folder.
Repeat the same process for all files as well. This time use file permission of 644 or 640 and don’t forget to select ‘Recurse into subdirectories’ and ‘apply to files only’. options.
Click OK button and your FTP client will now start setting permissions to all selected files.
Try using your website now, 403 forbidden error should be gone now.
We hope that at least one of the above three methods helped you fix the 403 Forbidden Error in WordPress. If you know any other method, please share with us in the comment section.
Also read: 26 Most Common WordPress Errors and How to Fix Them

Great article, thank you!
Just one quick observation. As the article mentions – once you rename the plugins folder, it will deactivate all plugins in one fell swoop – which is a great technique to find out whether a plugin is causing the problem. However – once you rename the plugin folder back to ‘plugins’ – the individual plugins remain deactivated – so you can use the admin to reactivate them one at a time, rather than having to go through the trouble of renaming them each individually.