How to use WordPress Testimonial Plugin
WP Testimonial Plus is a WordPress Testimonial Plugin to showcase testimonials on your site in a sophisticated & elegant layout.
WordPress Testimonial Plugin
Installation:
1. Download the wp-testimonial-plus.zip file & unzip to plugins folder located at
/wordpress/wp-content/plugins
2. Go to WordPress Dashboard -> Plugins -> Installed Plugins

3. Activate WordPress Testimonial Plugin.
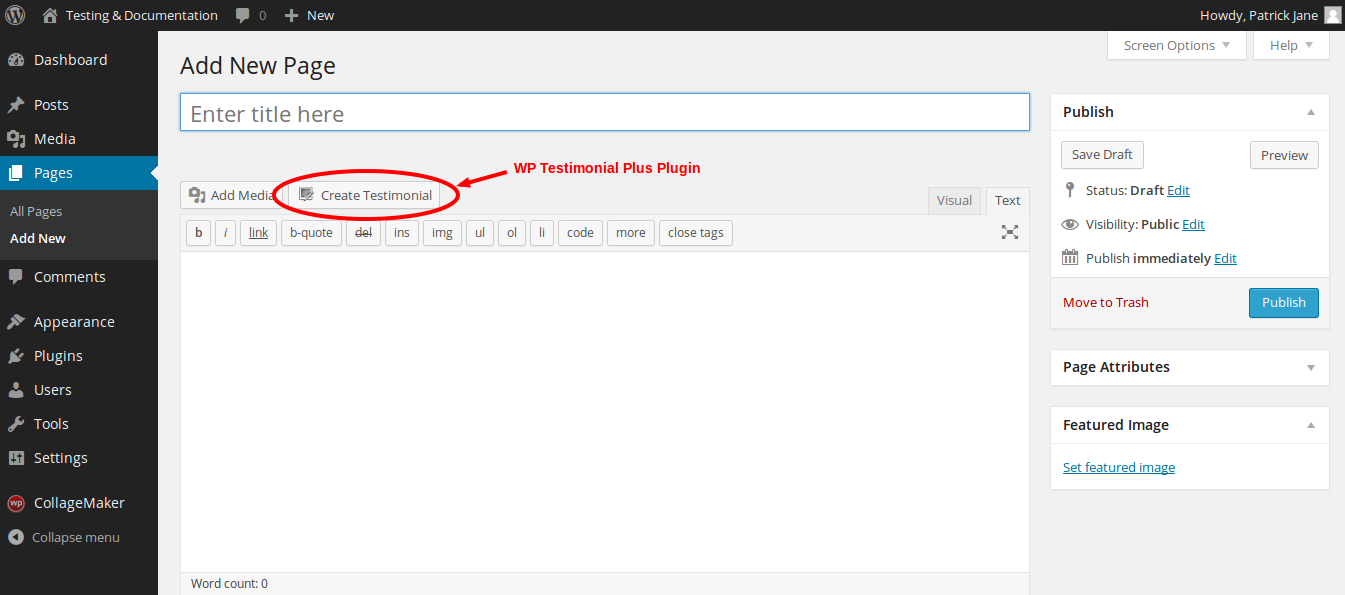
4. Add a new page / post to add a WP Testimonial Plus layout to your site. Click on Create Testimonial button.
Managing WordPress Testimonial Plugin
WP Testimonial Plus, the WordPress Testimonial Plugin will generate the shortcode automatically based on the layout & it’s settings as you create them. It provides an option to enable / disable the auto-play slider to scroll through the testmonials.
Testimonials : Showcase testimonials by users about your site with the Testimonials layout.
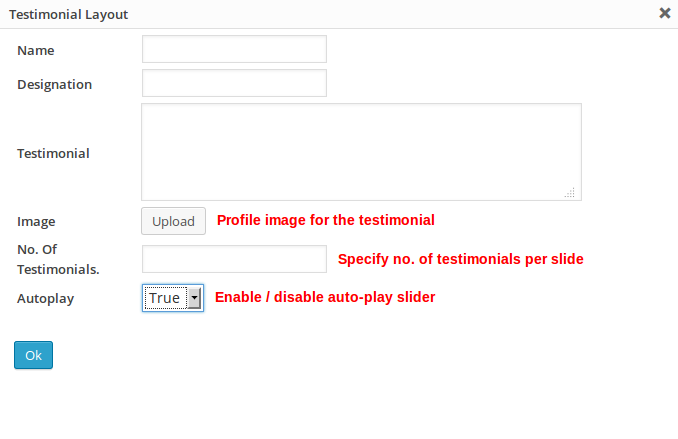
Name : Name of the testimonial writer.
Designation : Designation of the testimonial writer.
Testimonial : Testimonial text.
Image : Profile image to be displayed in the layout. Click Upload to upload an image.
No. Of Testimonials : Specify the number of testimonials to display per slide.
Autoplay : True | False. Enable / disable the auto-play slider.
Click Ok to generate the shortcode. Paste this shortcode in any post / page to embed the WP Testimonial Plus layout.
So that’s pretty much what you need to know in order to use WordPress Testimonial Plugin effectively. If you know of any other tips that I may have missed, do let me know by leaving a comment here.
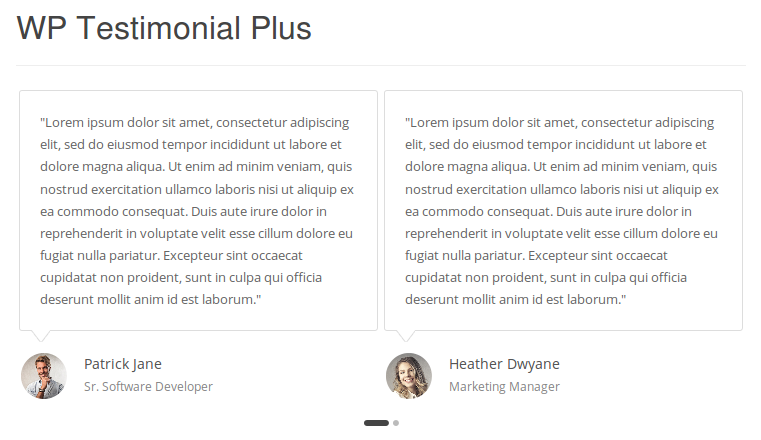
Display testimonials beautifully by users using WP Testimonial Plus on your WordPress site.
Leave a Reply