How to use Endurance theme to create classic one-page websites
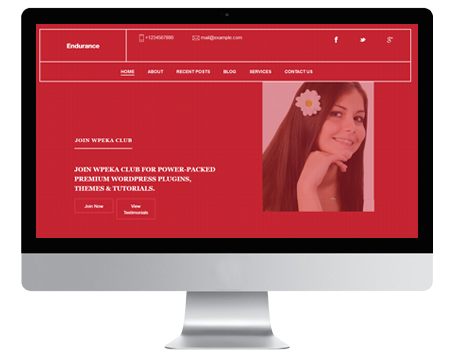
Endurance is a highly customizable theme with loads of widgets to choose from. Endurance is a fully responsive one page theme for your WordPress site. Easy to customize as per your preferences.
Here’s a step-by-step guide for configuring the Endurance Theme.
Installing Endurance one page theme
1. Download the endurance.zip file & unzip to themes folder located at
/wordpress/wp-content/themes
2. Go to WordPress Dashboard -> Appearance -> Themes
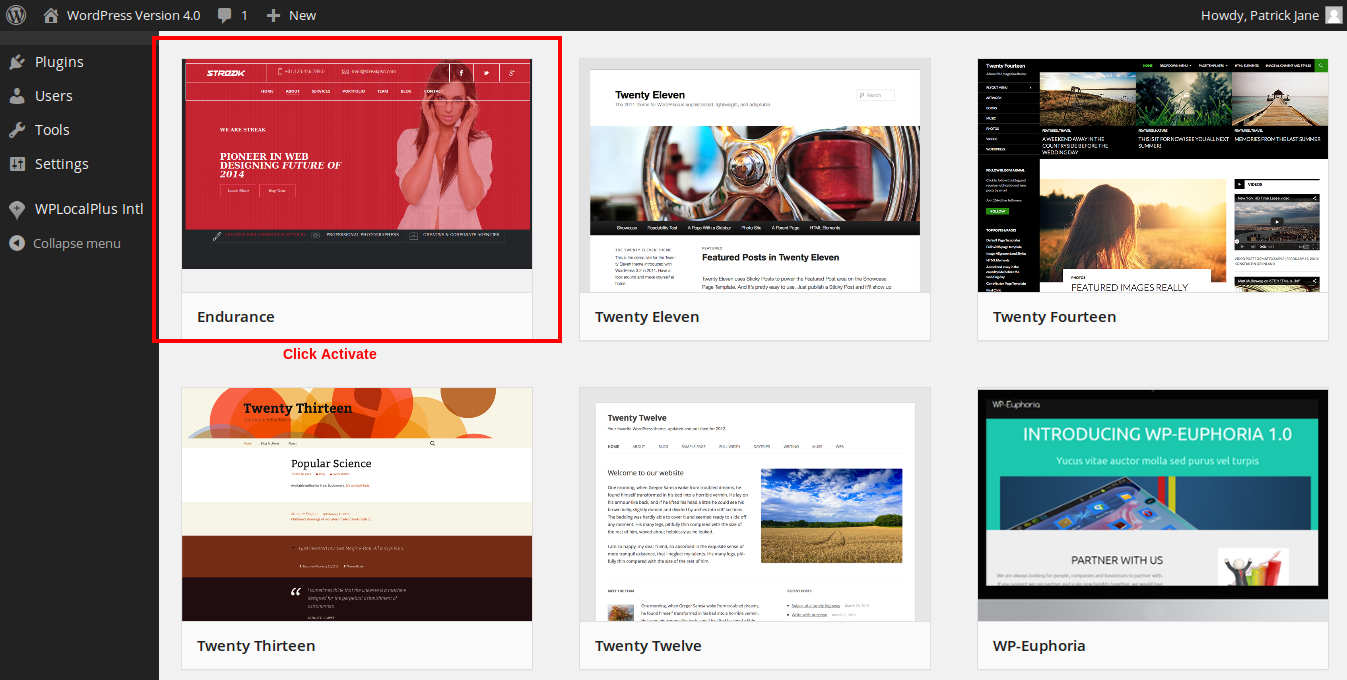
3. Activate this one page theme.
Note : Your site might appear blank on activation of this one page theme since the widgets of the theme have not been added yet to your site.
4. Go to WordPress Dashboard -> Appearance -> Theme Options
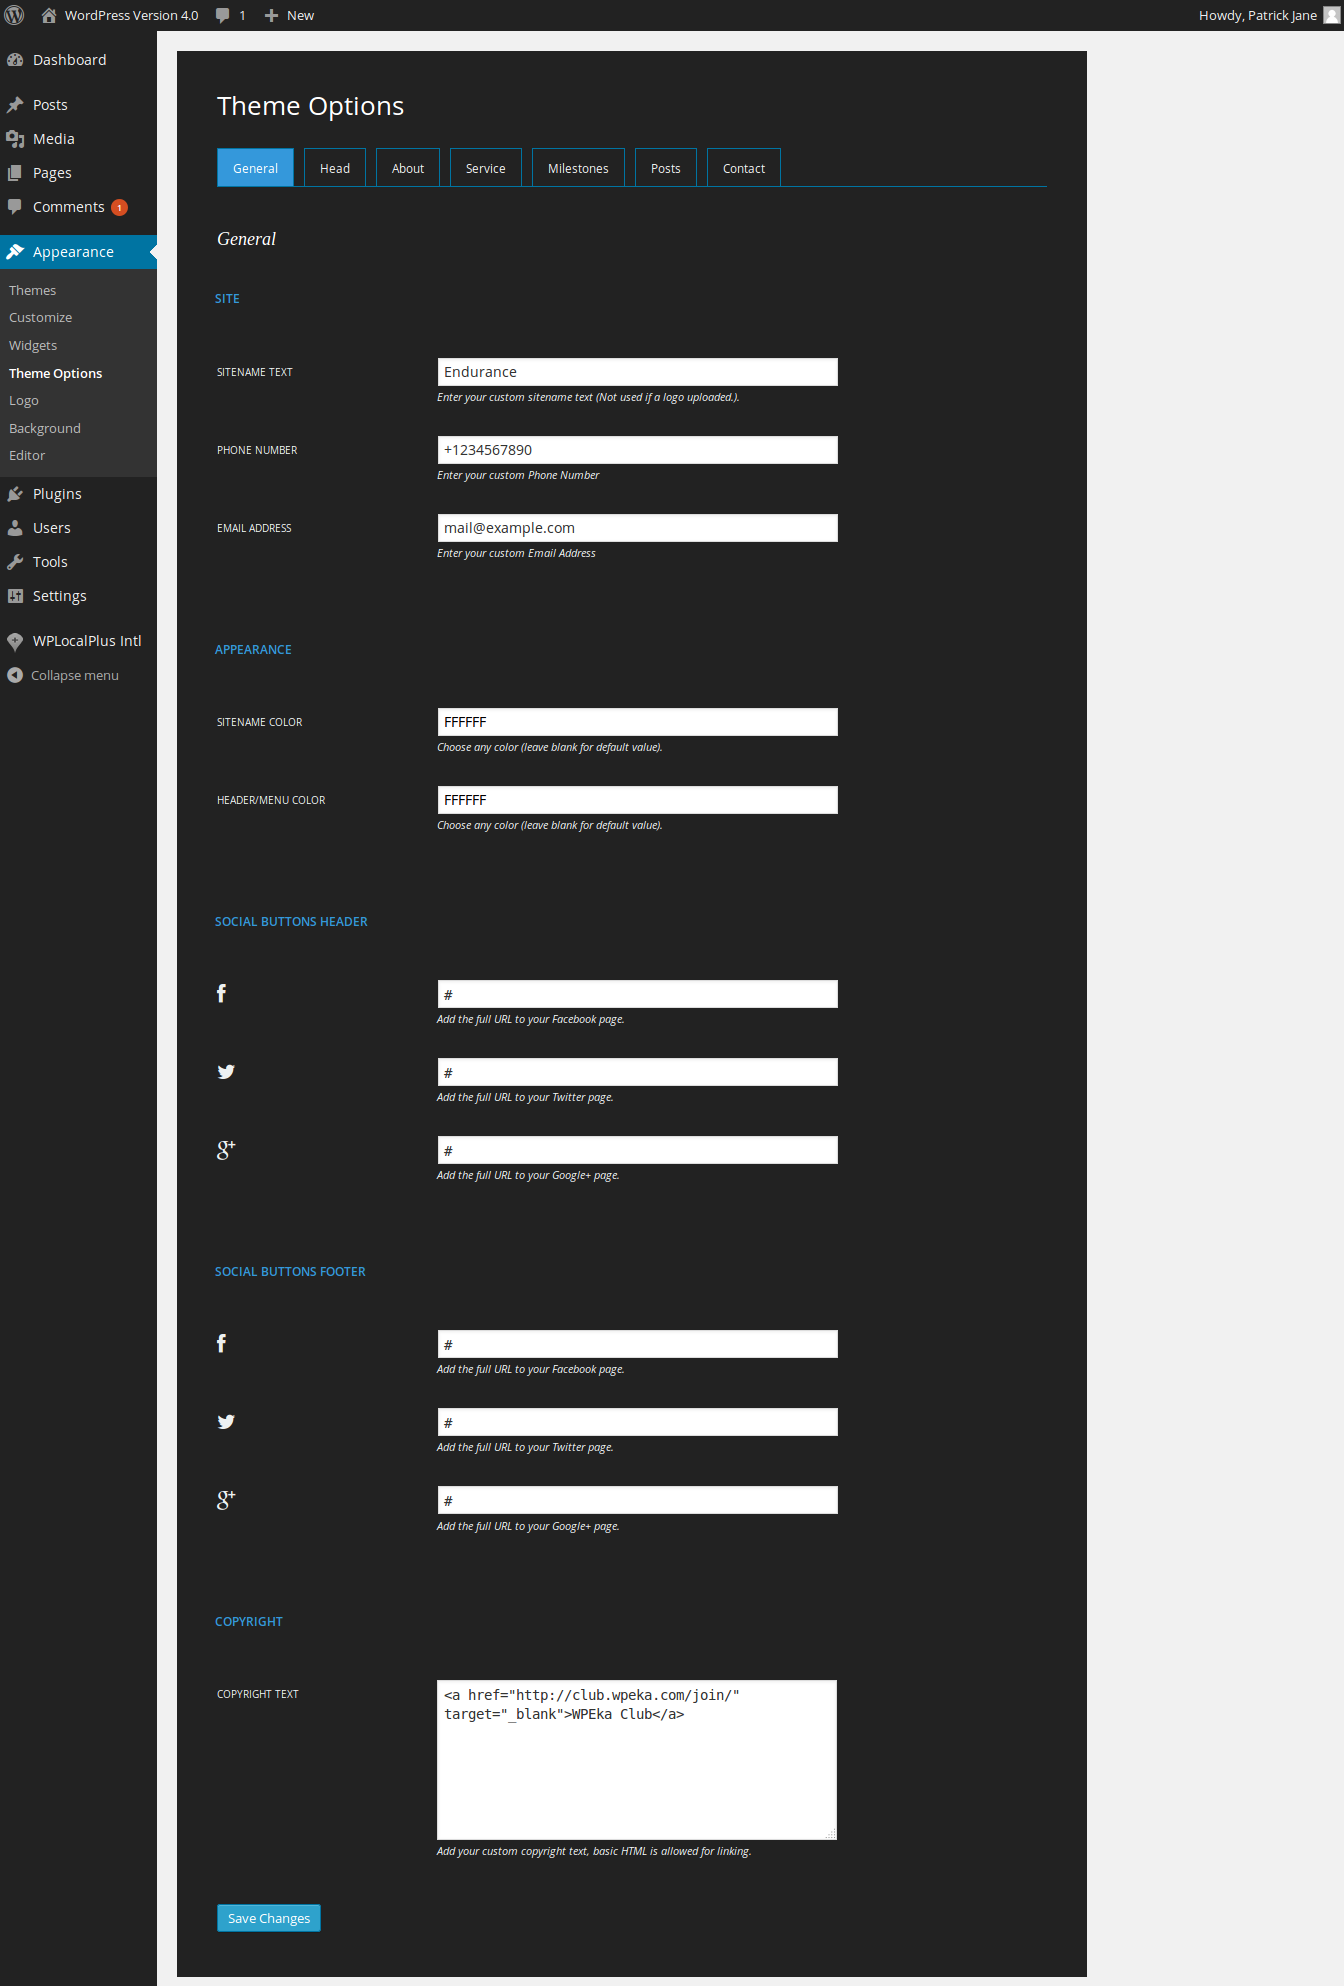
Customizing Endurance theme
1. General : Customize the general settings of your theme for the website.
General -> Site | Appearance | Social Buttons Header | Social Buttons Footer | Copyright
Site : Manage the sitename settings of your site.
- Sitename Text : Enter your custom sitename text.
- Phone Number : Enter your business contact number.
- Email Address : Enter your business email address.
Appearance : Manage the appearance settings of your site.
- Sitename Color : Choose any color to apply to the sitename (leave blank for default value).
- Header / Menu Color : Choose any color to apply to the header/menu (leave blank for default value).
Social Buttons Header : Manage the social button settings in the header section of your site.
- Facebook : Add the full URL to your Facebook page.
- Twitter : Add the full URL to your Twitter page.
- Google+ : Add the full URL to your Google+ page.
Social Buttons Footer : Manage the social button settings in the footer section of your site.
- Facebook : Add the full URL to your Facebook page.
- Twitter : Add the full URL to your Twitter page.
- Google+ : Add the full URL to your Google+ page.
Copyright : Manage the copyright text for your site.
- Copyright text : Add your custom copyright text (basic HTML is allowed for linking).
Click Save changes when done.
2. Head : Manage the header widget settings for your site.
Head -> Header Widget
Header Widget : Create / manage the header widget on your site.
- Menu Name : Enter your custom menu name.
- Main Heading : Add a widget title.
- Image Heading : Heading of the image.
- Image Description : Description of the image.
- Image Button 1 : Button text.
- Image Button Link 1 : External URL for the button.
- Image Button 2 : Button text
- Image Button Link 2 : External URL for the button.
- Image URL : Specify a full URL to your chosen image.
Click Save changes when done.

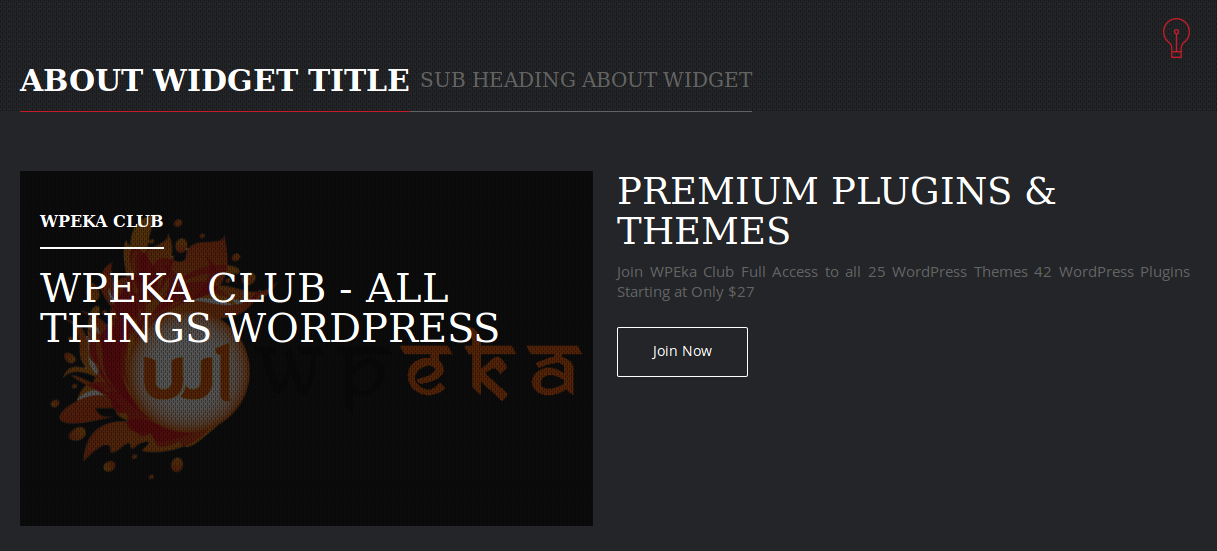
3. About : Manage the about widget settings for your site.
About -> About Widget
About Widget : Create / manage the about widget settings.
- Menu Name : Enter your custom menu name.
- Main Heading : Add a widget title.
- Main Sub Heading : Add sub heading to widget title.
- Image Heading : Add heading to image.
- Image Description : Add description to image.
- Description Heading : Add description heading.
- Description Text : Add description text.
- Button Text : Add button text.
- Button Link : External URL link to the button click.
- Image URL : Specify the full URL to your chosen image.
Click Save changes when done.
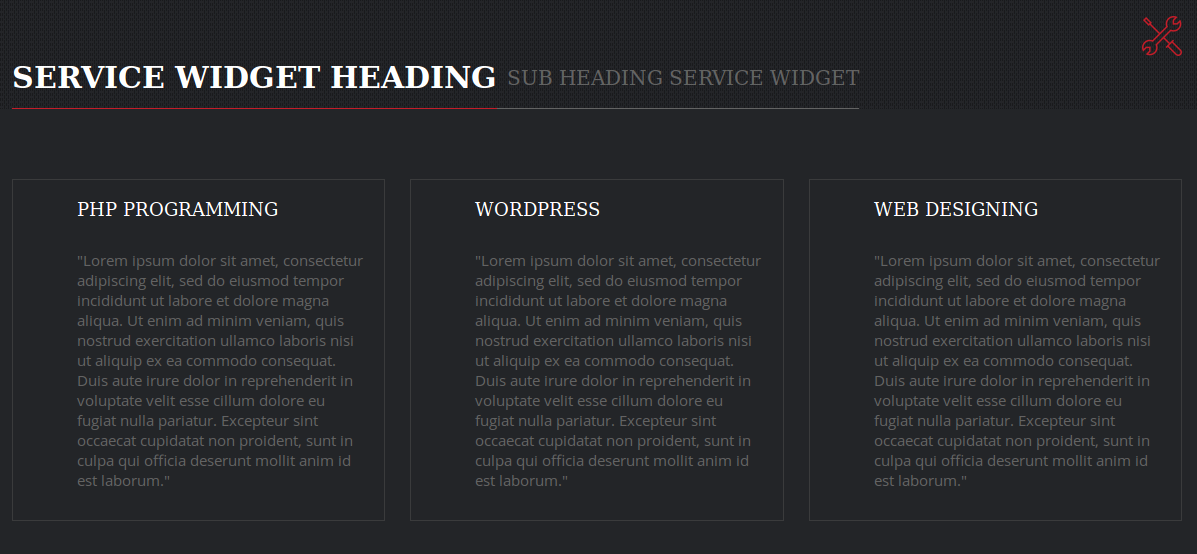
4. Service : Manage the service widget settings of your site.
Service -> Services Widget
Services Widget : Create / manage the services widget of your site.
- Menu Name : Enter your custom menu name.
- Widget Heading : Add a widget title.
- Widget Sub Heading : Add your custom sub heading text.
- Select Posts Category : Select the category of posts you want to display from a drop-down list.
- No. Of Posts To Display : Specify number of posts you want to display in the widget
Click Save changes when done.
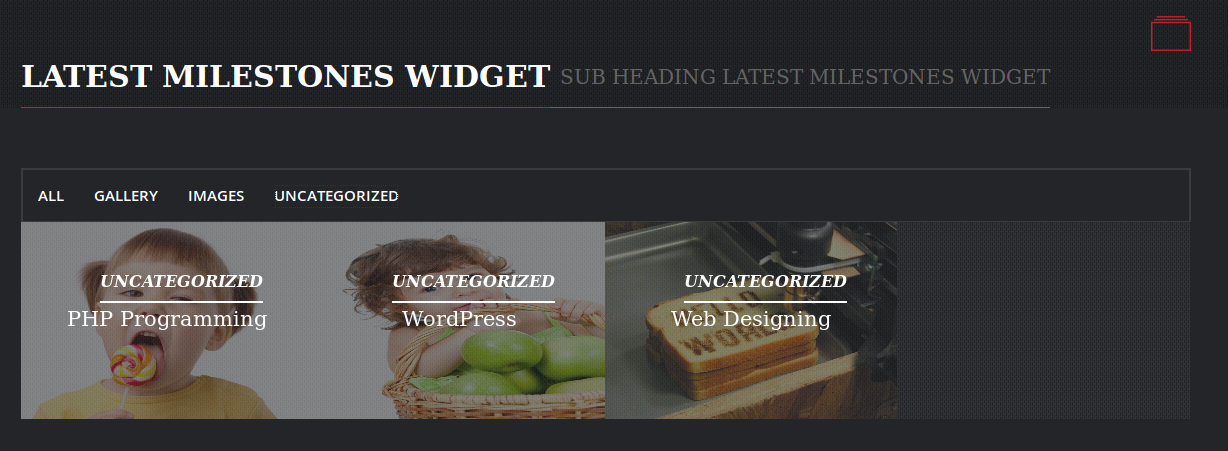
5. Milestones : Manage the latest milestones widget settings for your site.
Milestones -> Latest Milestone Widget
Latest Milestone Widget : Create / manage the latest milestone widget settings.
- Menu Name : Enter your custom menu name.
- Heading : Add your custom heading text.
- Sub Heading: Add sub heading to the widget.
Click Save changes when done.
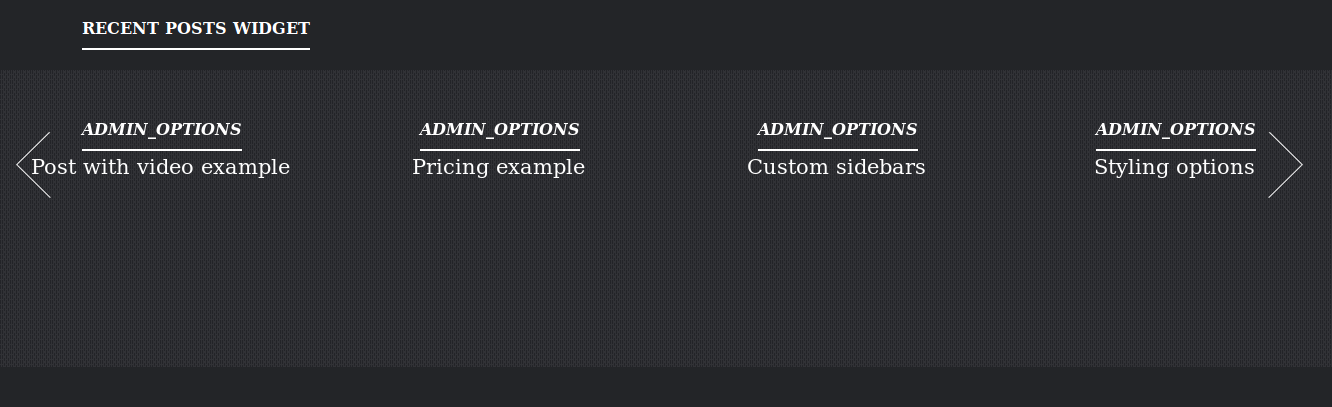
6. Posts : Manage the latest milestones widget settings for your site.
Posts -> Recent Posts Widget
Recent Posts Widget : Create / manage the recent posts widget settings.
- Menu Name : Enter your custom menu name.
- Heading : Add your custom heading text.
- Select Posts Category : Select the category of posts you want to display from a drop-down list.
- No. Of Posts To Display : Specify the number of posts you want to display in the widget
Click Save changes when done.
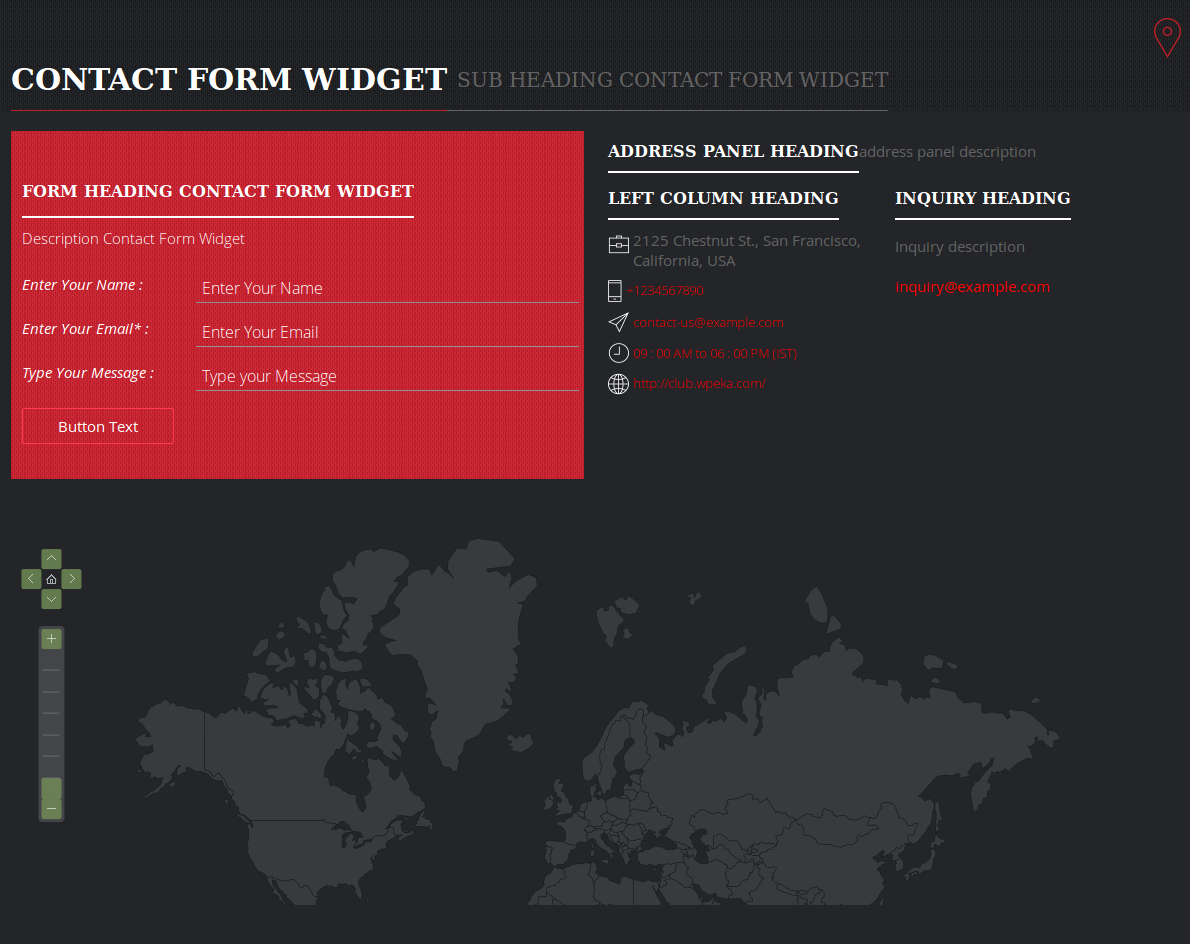
7. Contact : Manage the contact settings for your site.
Contact -> Contact Form Widget
Contact Form Widget : Create / manage the contact form widget settings.
- Menu Name : Enter your custom menu name.
- Main Heading : Add a widget title.
- Sub Heading : Add your custom sub heading text.
- Form Heading : Add your custom form heading text.
- Form Description : Add your custom form description.
- Button Text : Add custom text to button
- Address Panel Heading : Add your custom heading text.
- Address Panel Description : Add your custom description text.
- Left Column Heading : Add your custom heading text.
- Postal Address : Add your address.
- Phone Number : Add your Phone Number.
- Contact Email Address : Add your custom email address.
- Office Timings : Add office timings.
- Website URL : Add site URL.
- Inquiry Heading : Add your custom heading.
- Inquiry Description : Add your custom description.
- Inquiry Email : Add your inquiry email address.
Click Save changes when done.
Note : On making changes to the widgets through the settings mentioned above; add the widgets by navigating to WordPress Dashboard -> Appearance -> Widgets.
So that’s pretty much what you need to know in order to use the Endurance theme effectively. For a live demo of the Endurance WordPress Theme.
Endurance one page theme is a smart option for your sites.
Leave a Reply