How To Use Happily Ever After WordPress Wedding Theme
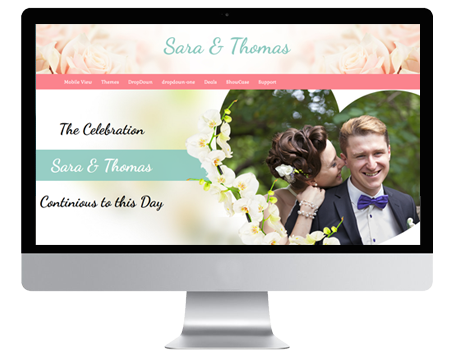
Happily Ever After Is A Beautiful Responsive WordPress Wedding Theme.
Looking for a WordPress wedding theme? Get Happily Ever After and add extra spark to your website website.
Here’s a step-by-step guide for configuring Happily Ever After.
Installing Happily Ever After WordPress Wedding theme
1. Download the happily-ever-after.zip file & unzip to themes folder located at
/wordpress/wp-content/themes
2. Go to WordPress Dashboard -> Appearance -> Themes
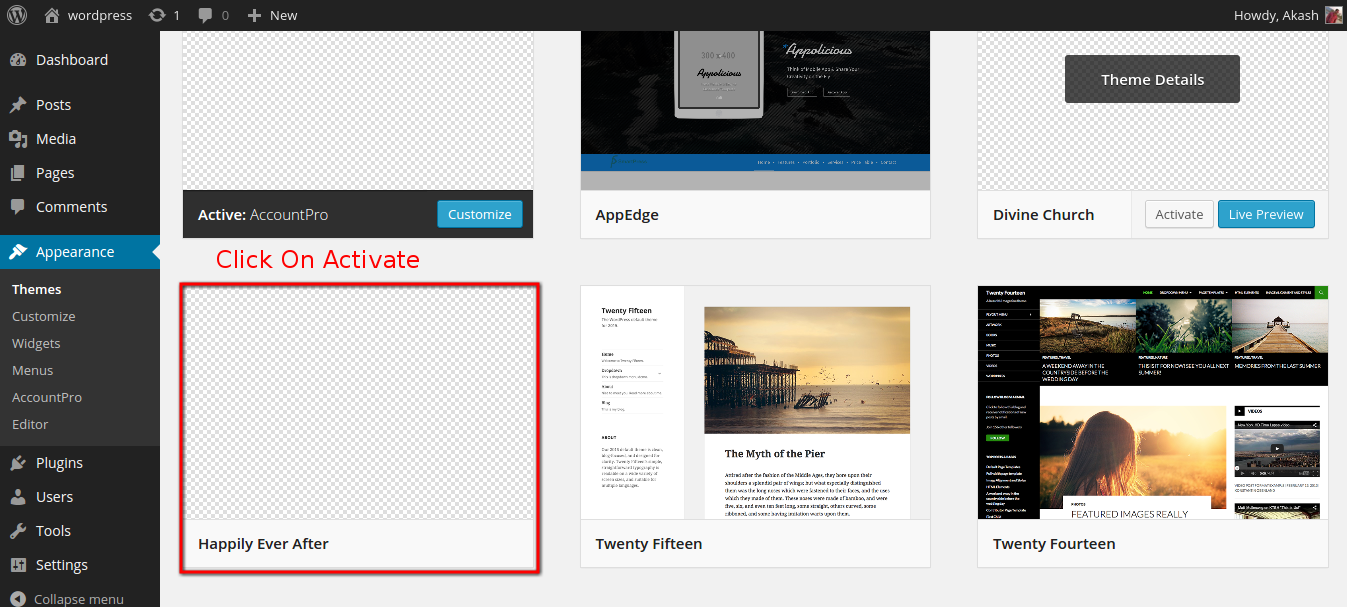
3. Activate Happily Ever After theme.
Customizing Happily Ever After
Go to WordPress Dashboard -> Happily Ever After -> Theme Options
Theme Options -> Header | Home Page | Social Connect | Footer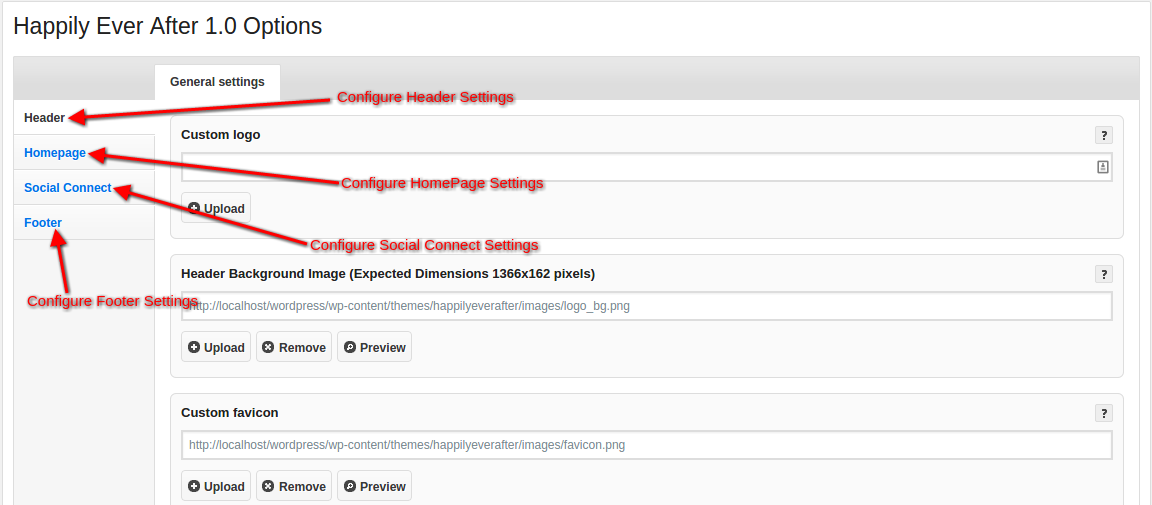
1. Header: Customize the header of your website.
- You can add custom logos to your site. Click on the Upload button -> Select an image -> Click on Open
![]()
- You can add header background image to your site. Click on Upload button to select your image. Click on Remove if you want to remove the image. Click on Preview to see the preview of the image on your site.

- You can also add a favicon to your site.
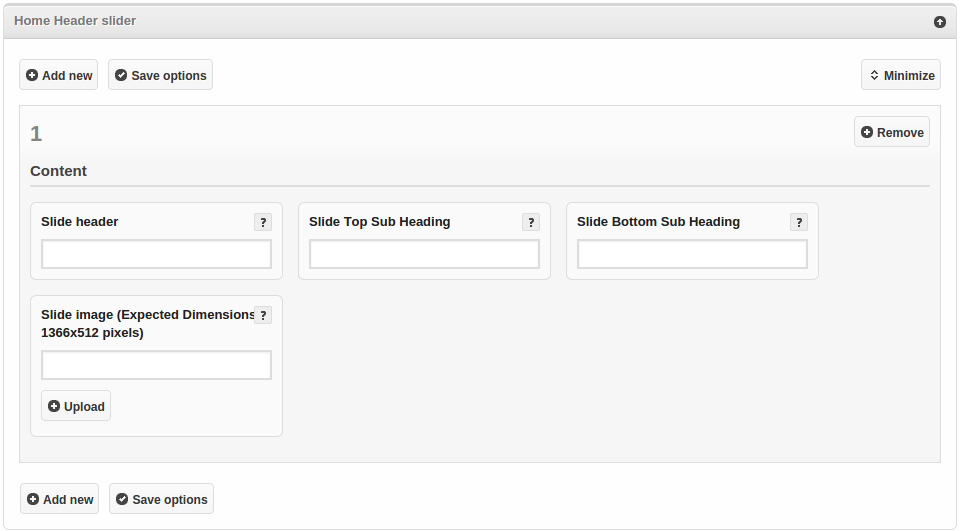
- You can add a home header slider to your site. Click on Add New -> Fill in Slide Header details, Slide Top Sub-heading details, Slide Bottom Sub-heading details, click on Upload button to add a slide image
Click on Save Changes when done.
To reset your settings, click on Reset.
2. HomePage: Manage the homepage of your website.
Here you can add a title to your page, add Groom and Bride details, Event details, add photos to gallery, RSVP and add gift registry as well.
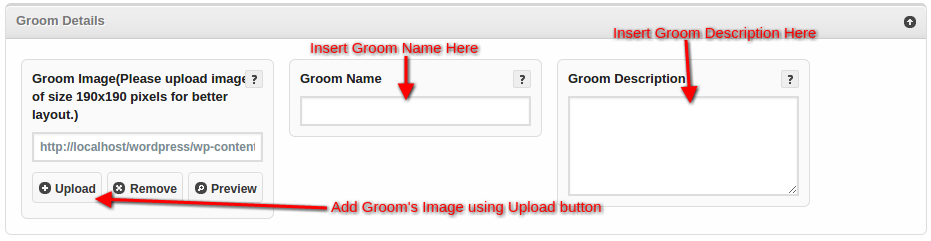
- Groom Details – Click on Upload to add groom’s photo; Insert groom’s name and description in the respective columns; To remove an existing image, click on Remove, see the preview by clicking on Preview button.
- Bride Details – Click on Upload to add bride’s photo; Insert bride’s name and description in the respective columns; To remove an existing image, click on Remove, see the preview by clicking on Preview button.
- Add a lovable message and marriage date in the Lovable Marriage Details section.

- Event details – Add all the marriage event’s details in Event Details section
Event details -> Main Ceremony Details | Wedding Event | Wedding Party Details
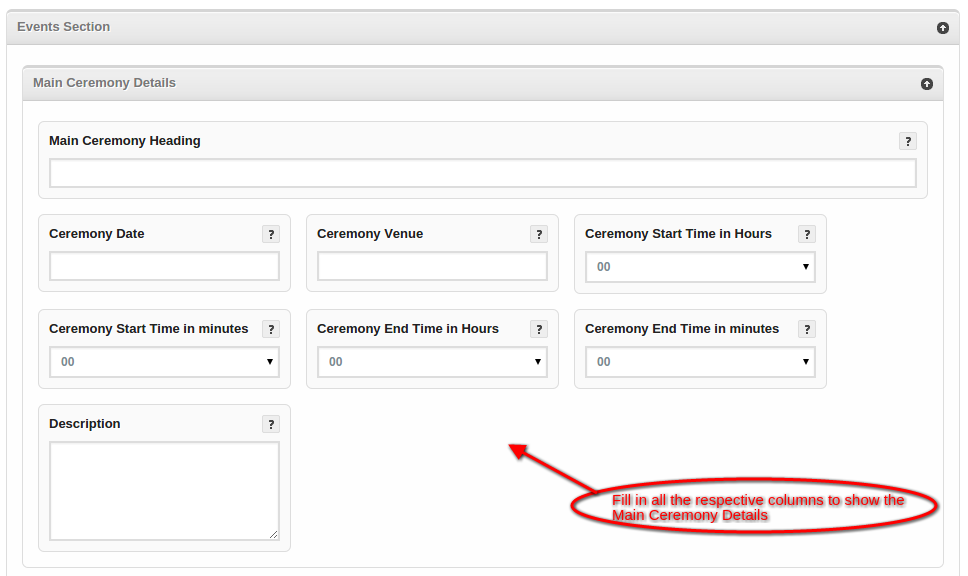
- Main Ceremony Details – You can add the ceremony details in this sub-section. Enter ceremony heading, date, venue, ceremony start time & end time in hours and minutes (which displays in a time counter in the front end) and a brief description here.
2. Wedding Event – You can add heading for the event and the wedding image here.
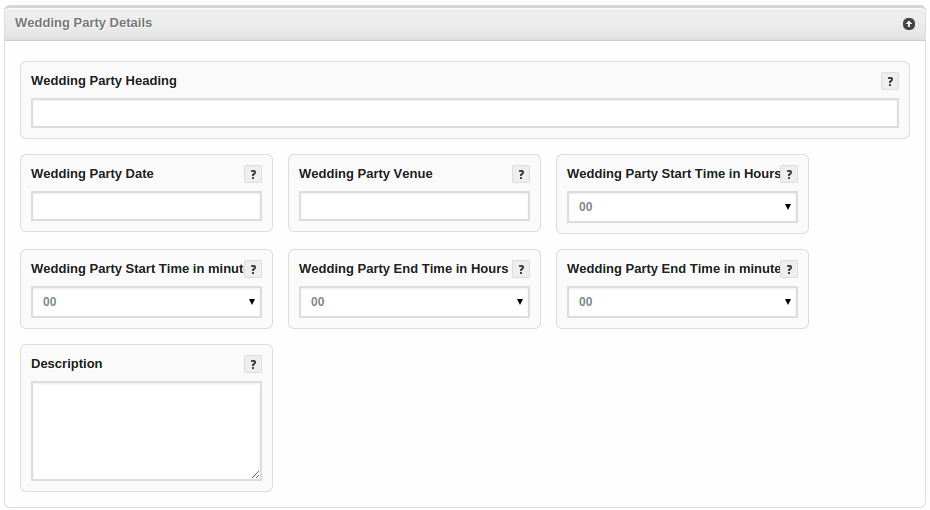
3. Wedding Party Details – You can add Wedding Party Details in this sub-section. Enter wedding party heading, date, venue, wedding party start time & end time in hours and minutes and a brief description here.
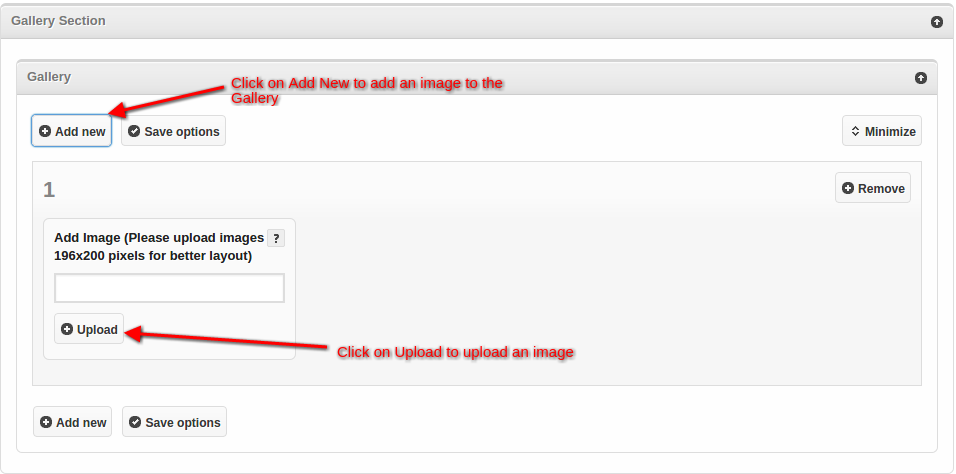
- Gallery Section – In this section, you can add images to the gallery of your site. Click on Add New -> Add Image box will appear -> Click on Upload to add an image now.
- RSVP Section – You can add an RSVP section to your site by adding RSVP heading, Maximum number of guests, Button text and an image here.

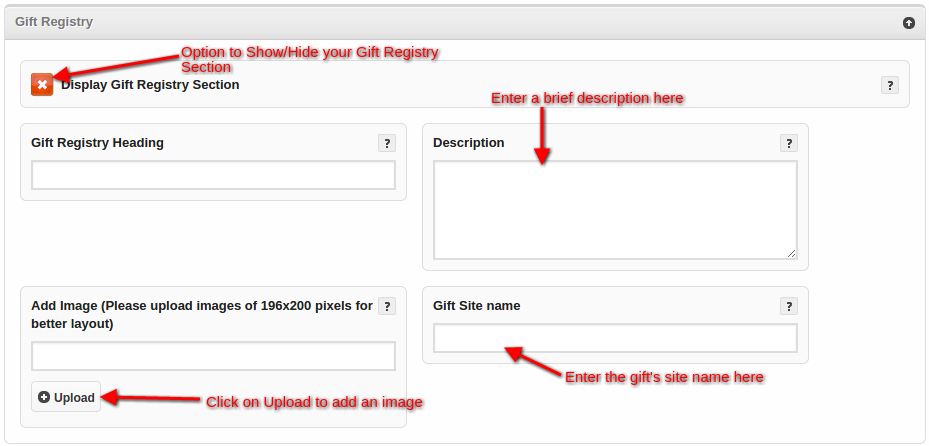
- Gift Registry Section – You can add a gift registry section to your site by adding Gift Registry Heading, Description, Gift site name and an image here.
Click on Save Changes when done.
To reset your settings, click on Reset.
3.Social Connect – Manage the social icons for your site.
Here you can add URLs to your social profile for Twitter, Facebook, Google+, Pinterest. You can also choose to show/hide your social profiles.
![]()
Click on Save Changes when done.
To reset your settings, click on Reset.
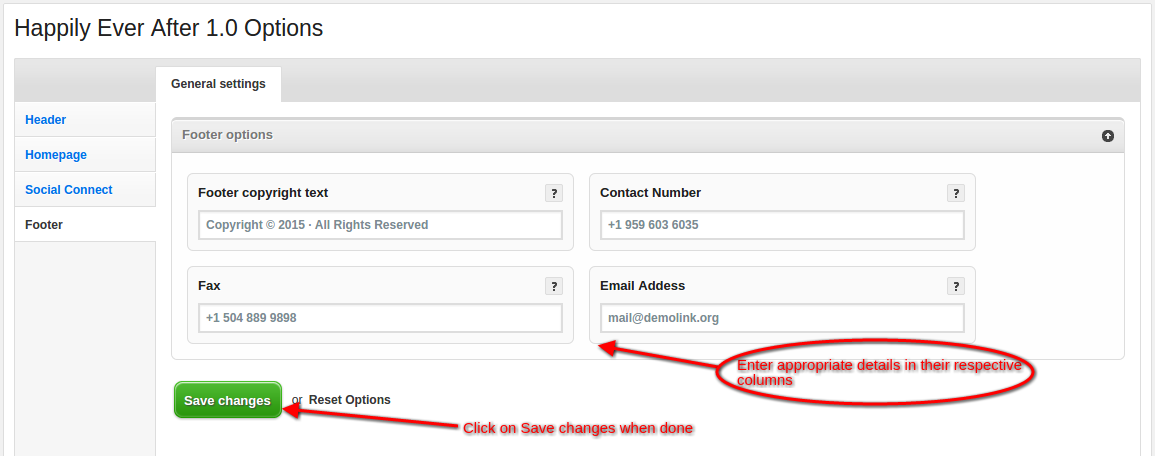
4. Footer – Customize the Footer of your website.
you can add Footer Copyright Text, Contact Number, Fax and Email Address to your website. Fill in the respective fields to add this section.
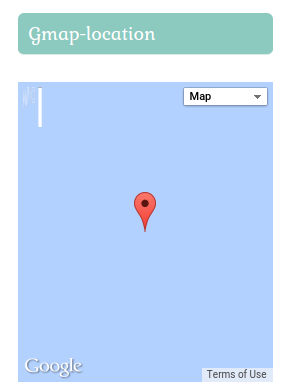
Widgets -> GMap Location | Contact Info | Coming Soon
You can use GMap Location Widget to your site to display the location of the event.
You can use Contact Info widget to display the contact details to your site.

You can also use Coming Soon Widget to your site to show the upcoming functions of wedding.
So that’s pretty much what you need to know in order to get started with Happily Ever After. If you know of any other tips that I may have missed, do let me know by leaving a comment here.
For a live demo of Happily Ever After WordPress Wedding Theme
Use this amazing theme to make weddings perfect.
Leave a Reply